Difference between revisions of "Edit an Employee"
From MyFacilityFitPro_Wiki
(→Edit an Employee) (Tag: VisualEditor) |
(Tag: VisualEditor) |
||
| (One intermediate revision by the same user not shown) | |||
| Line 4: | Line 4: | ||
|- style="vertical-align:top;" | |- style="vertical-align:top;" | ||
|<big>'''<font size="5">1</font>'''</big> | |<big>'''<font size="5">1</font>'''</big> | ||
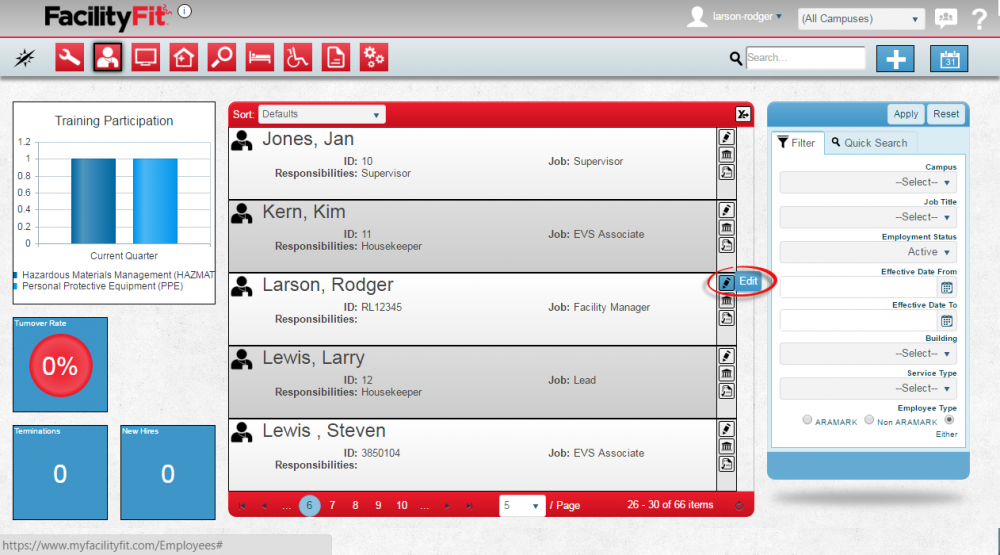
| − | |Select an employee to be edited. Click the '''Edit''' button to open the employee edit window. | + | |Select an employee to be edited. Click the '''Edit''' button [[File:EditButton.png]] to open the employee edit window. |
[[File:Employee-EditEmployee1.png|1000x1000px]] | [[File:Employee-EditEmployee1.png|1000x1000px]] | ||
| − | + | |- | |
| − | |- | + | |
|<big>'''<font size="5">2</font>'''</big> | |<big>'''<font size="5">2</font>'''</big> | ||
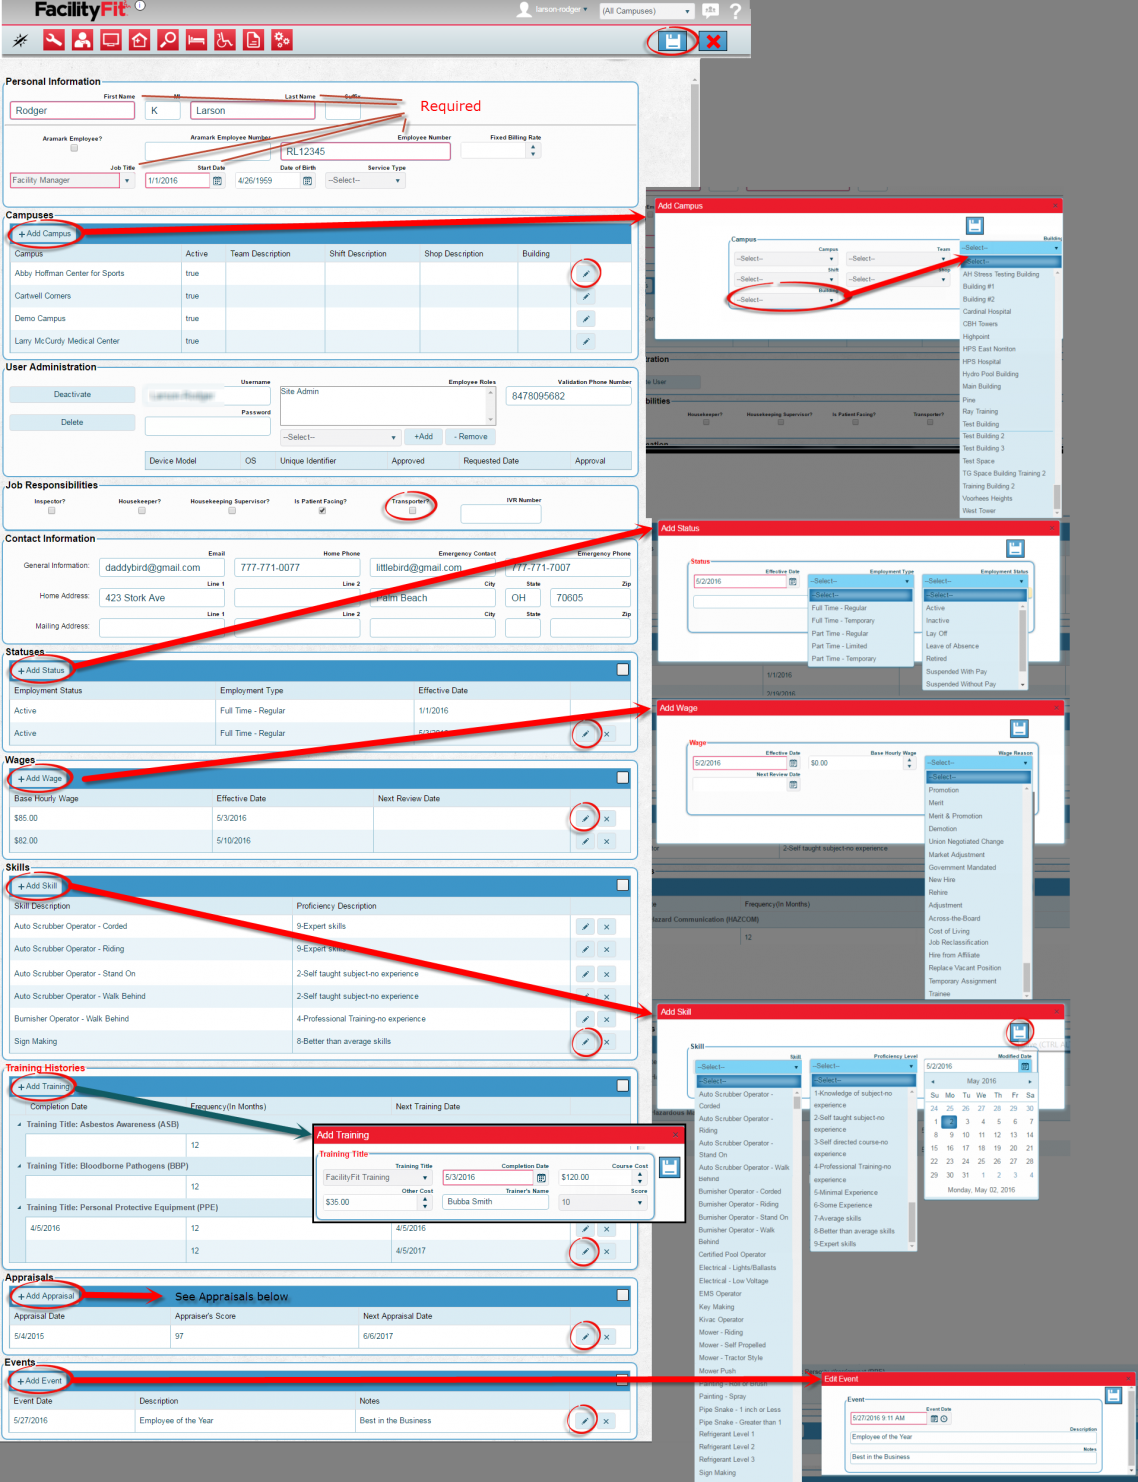
|The Edit Employee window will open. | |The Edit Employee window will open. | ||
| Line 33: | Line 32: | ||
* Start Date | * Start Date | ||
| − | [[File:Employee-EditPageRL.png|1482x1482px]] | + | [[File:Employee-PersonalInformation.png]] |
| + | |- style="vertical-align:top;" | ||
| + | |<big>'''<font size="5">3</font>'''</big> | ||
| + | |Fill out the other sections as needed.[[File:Employee-EditPageRL.png|1482x1482px]] | ||
Add buttons are available for the following sections: | Add buttons are available for the following sections: | ||
| Line 46: | Line 48: | ||
|- style="vertical-align:top;" | |- style="vertical-align:top;" | ||
| − | |<big>'''<font size="5"> | + | |<big>'''<font size="5">4</font>'''</big> |
|Press the '''Save''' button [[File:Save.png]] to save the edited information. | |Press the '''Save''' button [[File:Save.png]] to save the edited information. | ||
|- style="vertical-align:top;" | |- style="vertical-align:top;" | ||
| − | |<big>'''<font size="5"> | + | |<big>'''<font size="5">5</font>'''</big> |
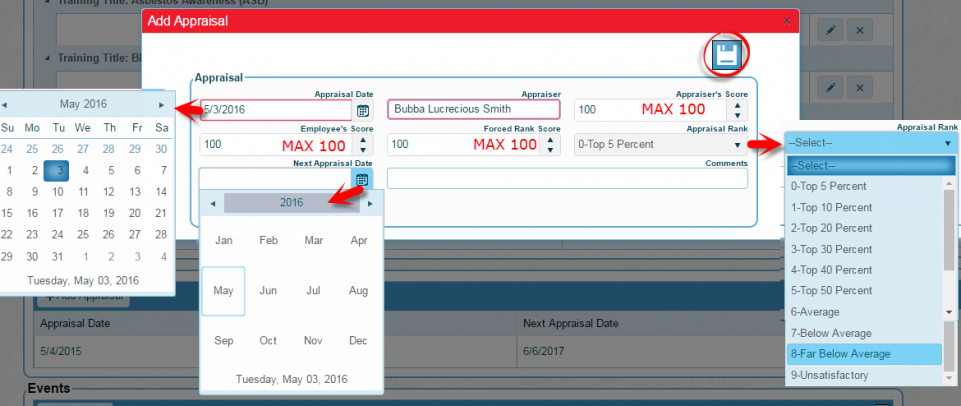
|The edit '''Appraisals''' button can be used to open the Appraisals window. | |The edit '''Appraisals''' button can be used to open the Appraisals window. | ||
* Required fields are in Red (Appraisal Date, Appraiser). | * Required fields are in Red (Appraisal Date, Appraiser). | ||
| Line 59: | Line 61: | ||
|- style="vertical-align:top;" | |- style="vertical-align:top;" | ||
| − | |<big>'''<font size="5"> | + | |<big>'''<font size="5">6</font>'''</big> |
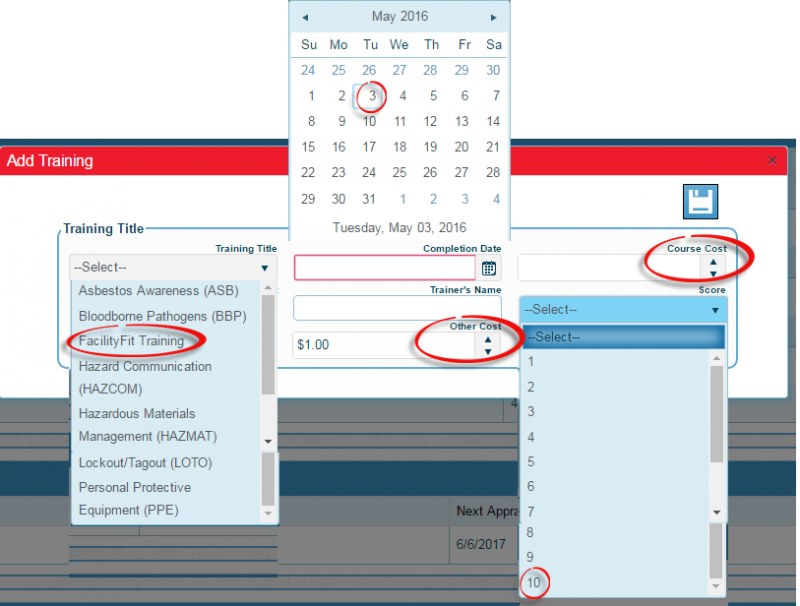
|The '''Add Training''' button can be used to open the employee training window. | |The '''Add Training''' button can be used to open the employee training window. | ||
* Required field is in Red (Completion date). | * Required field is in Red (Completion date). | ||


