Difference between revisions of "Adding a Meeting"
From MyFacilityFitPro_Wiki
(→Adding a Meeting) |
(Tag: VisualEditor) |
||
| (3 intermediate revisions by the same user not shown) | |||
| Line 1: | Line 1: | ||
| − | == Adding a Meeting == | + | == Employee - Adding a Meeting == |
{| class="wikitable" border="1" | {| class="wikitable" border="1" | ||
| Line 11: | Line 11: | ||
|Once the Meeting window is open the Calendar is visible, showing any current meetings. | |Once the Meeting window is open the Calendar is visible, showing any current meetings. | ||
| − | '''Calendar'''<br /> | + | '''Calendar'''<br />Users can create new meetings by two methods: |
| − | Users can create new meetings by two methods: | + | *Double click on a day on the calendar, '''or''' |
| − | *Double | + | *Click the '''Add''' button in the top right corner.<br /> |
| − | *Click the Add button in the top right corner.<br /> | + | |
Either method will display a Meeting detail screen.<br /> | Either method will display a Meeting detail screen.<br /> | ||
| Line 22: | Line 21: | ||
|- style="vertical-align:top;" | |- style="vertical-align:top;" | ||
|<big>'''<font size="5">3</font>'''</big> | |<big>'''<font size="5">3</font>'''</big> | ||
| − | | '''General Information''' | + | | '''General Information''' |
| − | *Type in the '''Topic'''. | + | *Type in the '''Topic'''. |
| − | *Select the '''Start Date''' / '''Start Time''' and '''End Date''' / '''End Time''' (required fields). | + | *Select the '''Start Date''' / '''Start Time''' and '''End Date''' / '''End Time''' (required fields). |
| − | *Select a '''Topic''' and any other detail fields as necessary (optional). | + | *Select a '''Topic''' and any other detail fields as necessary (optional). |
*Click the '''Save''' button to display the '''Invitation''' options.<br /> | *Click the '''Save''' button to display the '''Invitation''' options.<br /> | ||
[[File:Employee-Meeting2.png|1000px]] | [[File:Employee-Meeting2.png|1000px]] | ||
| Line 42: | Line 41: | ||
|<big>'''<font size="5">5</font>'''</big> | |<big>'''<font size="5">5</font>'''</big> | ||
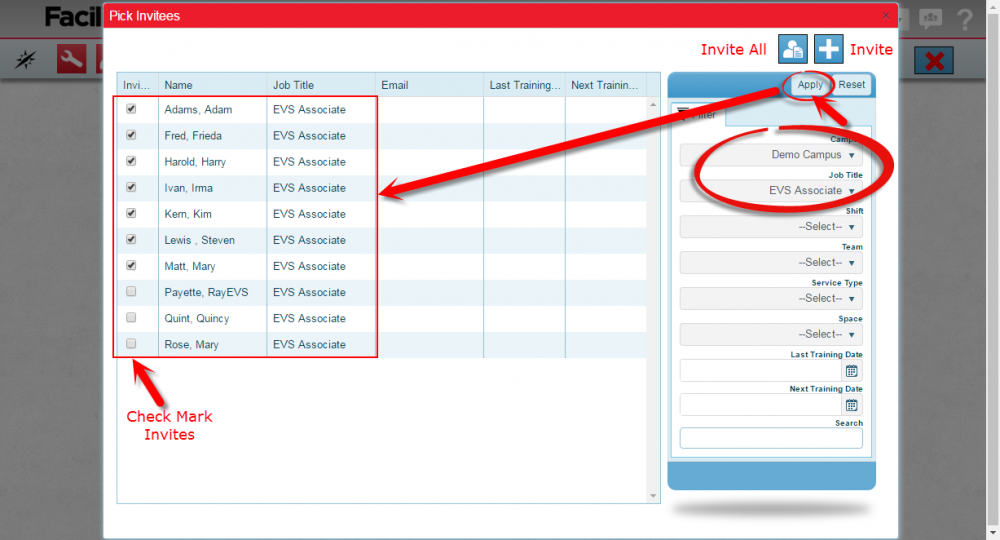
|'''Invitation Options 2- Add Invitees (Multiple)'''<br /> | |'''Invitation Options 2- Add Invitees (Multiple)'''<br /> | ||
| − | *Select '''Add Invitees''' to open the '''Pick Invitees''' window. | + | *Select '''Add Invitees''' to open the '''Pick Invitees''' window. |
* Check '''Boxes''' to select multiple employees, '''or''' | * Check '''Boxes''' to select multiple employees, '''or''' | ||
* Modify the filter to the right of the list (optional). Select all is available. | * Modify the filter to the right of the list (optional). Select all is available. | ||
* Click the '''Apply''' button.<br /> | * Click the '''Apply''' button.<br /> | ||
| − | '''NOTE:''' Employees whose job title is connected to the Training Title will have boxes checked automatically.<br /> | + | '''NOTE:''' Employees whose job title is connected to the Training Title will have boxes checked automatically.<br />Uncheck to remove them from the invitation if necessary. |
| − | Uncheck to remove them from the invitation if necessary. | + | |
| − | [[Image:AddMultipleInvitees | + | [[Image:AddMultipleInvitees.png|700px]] |
| − | + | ||
| − | + | ||
| + | [[File:Employee-MeetingsInviteAll.png|1000px]] | ||
|- style="vertical-align:top;" | |- style="vertical-align:top;" | ||
|<big>'''<font size="5">6</font>'''</big> | |<big>'''<font size="5">6</font>'''</big> | ||
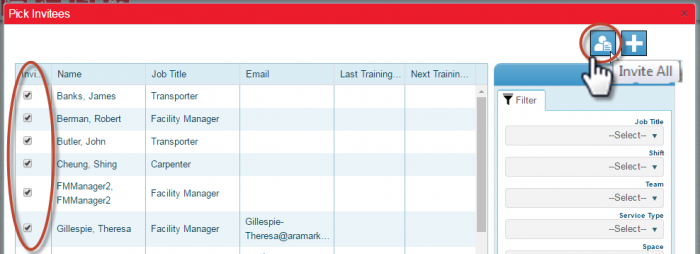
| − | | | + | |All employees in the list will be part of the invitation. |
| − | All employees in the list will be part of the invitation. | + | |
*Select the '''Invite All''' Icon. This will check every box automatically. | *Select the '''Invite All''' Icon. This will check every box automatically. | ||
*Click the '''Apply''' button. | *Click the '''Apply''' button. | ||
| + | |||
[[Image:InviteAll.png|700px]] | [[Image:InviteAll.png|700px]] | ||
|- style="vertical-align:top;" | |- style="vertical-align:top;" | ||
|<big>'''<font size="5">7</font>'''</big> | |<big>'''<font size="5">7</font>'''</big> | ||
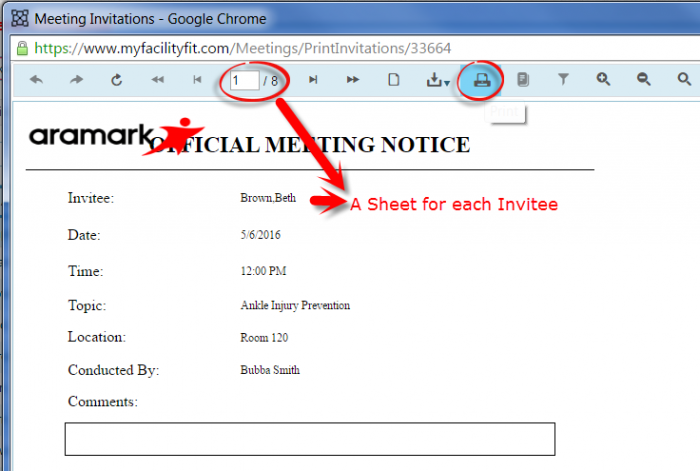
| − | | | + | |The new meeting invitations '''Print Preview Page''' will open. |
| − | The new meeting invitations '''Print Preview Page''' will open. | + | |
[[Image:Employee-MeetingPrintInvitations.png|700px]] | [[Image:Employee-MeetingPrintInvitations.png|700px]] | ||
|- style="vertical-align:top;" | |- style="vertical-align:top;" | ||
|<big>'''<font size="5">8</font>'''</big> | |<big>'''<font size="5">8</font>'''</big> | ||
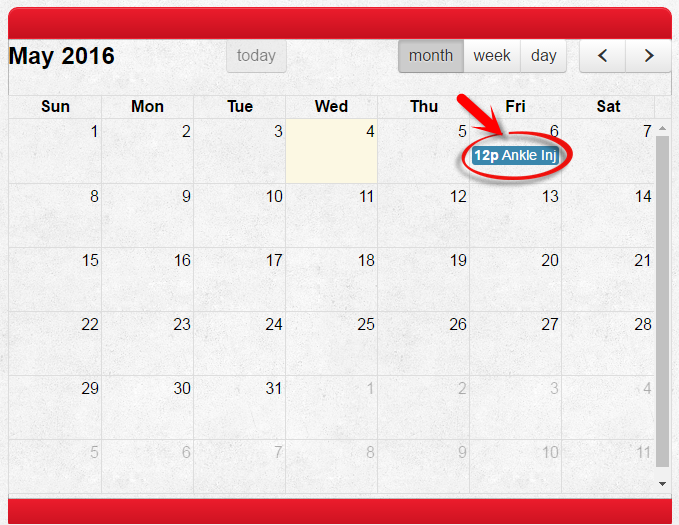
| − | | | + | |The new meeting now appears in the Calendar view. |
| − | The new meeting appears in the Calendar view. | + | |
| − | + | ||
[[Image:Employee-Meeting-CalendarFinal.png|700px]] | [[Image:Employee-Meeting-CalendarFinal.png|700px]] | ||
Latest revision as of 13:12, 4 May 2016
Employee - Adding a Meeting
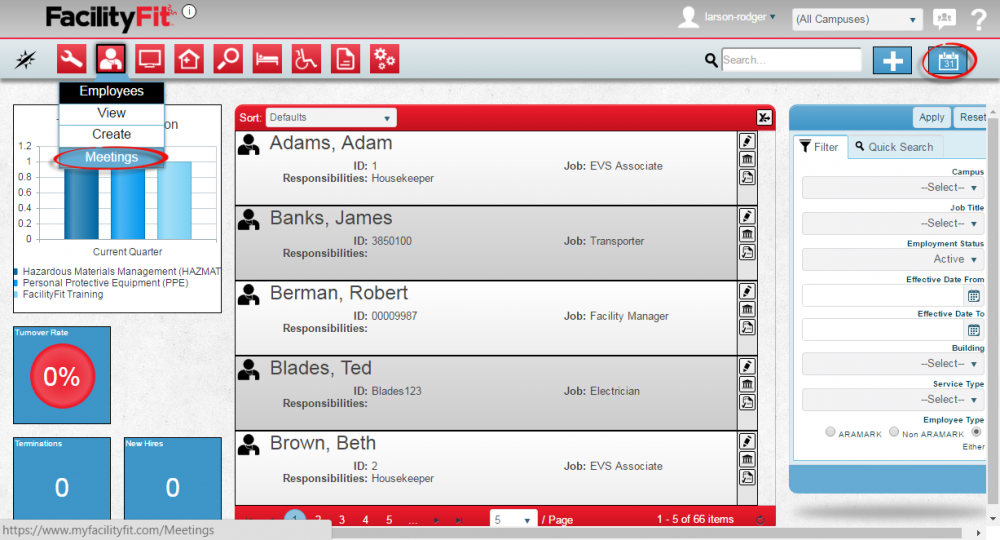
| 1 | Go to the Meeting window by using the employee dropdown and selecting meeting, or clicking on the meeting icon after opening employee window. |
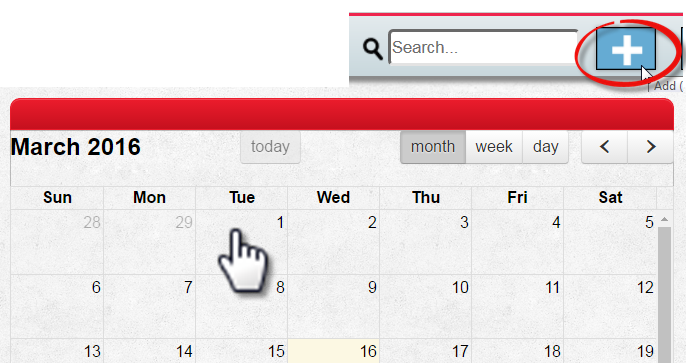
| 2 | Once the Meeting window is open the Calendar is visible, showing any current meetings.
Calendar
Either method will display a Meeting detail screen.
|
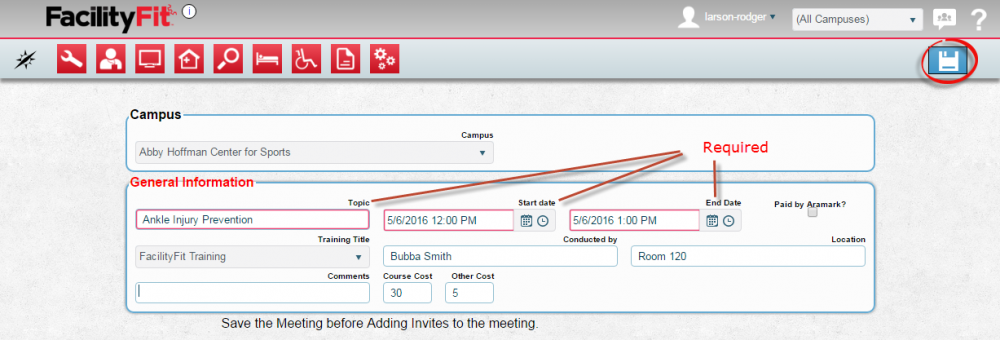
| 3 | General Information
|
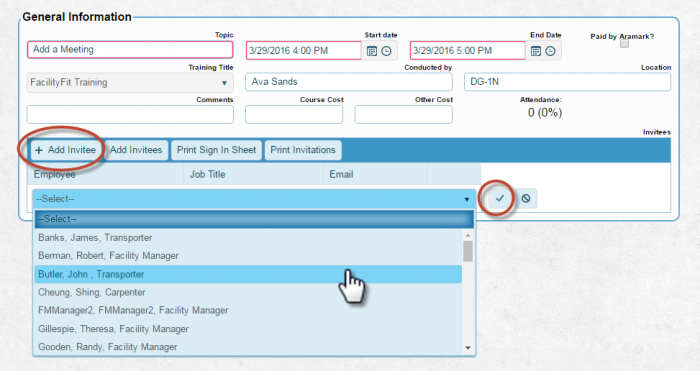
| 4 | Invitation Options 1 - Add Invitee (Single)
|
| 5 | Invitation Options 2- Add Invitees (Multiple)
NOTE: Employees whose job title is connected to the Training Title will have boxes checked automatically. |
| 6 | All employees in the list will be part of the invitation.
|
| 7 | The new meeting invitations Print Preview Page will open. |
| 8 | The new meeting now appears in the Calendar view.
|
