From MyFacilityFitPro_Wiki
|
|
| Line 27: |
Line 27: |
| | |- style="vertical-align:top;" | | |- style="vertical-align:top;" |
| | |<big>'''<font size="5">3</font>'''</big> | | |<big>'''<font size="5">3</font>'''</big> |
| − | |'''Add a New Cost Center Import A''' | + | |'''Add a New Cost Center Import''' |
| | # Once the new template is prepared, press the '''Select Files''' button. | | # Once the new template is prepared, press the '''Select Files''' button. |
| | # Select the new template you have prepared | | # Select the new template you have prepared |
Revision as of 08:50, 24 May 2016
Cost Center Import
Add Cost Center Import to the transport request system.
| 1
|
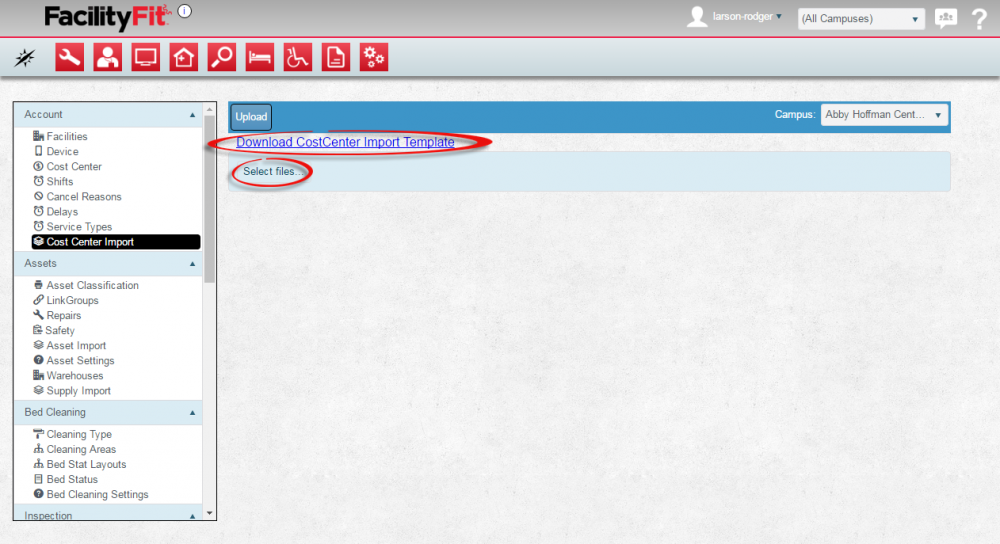
Click the large Admin icon to open the Administration window. 
Under the Account section, press the Cost Center Import link. The Cost Center Import window will open.
- To edit a Cost Center Import template, click the Download CostCenter Import Template link at the top of the window.
- To upload a new Cost Center Import template, press the Select Files button.
|
| 2
|
Edit a Cost Center Import
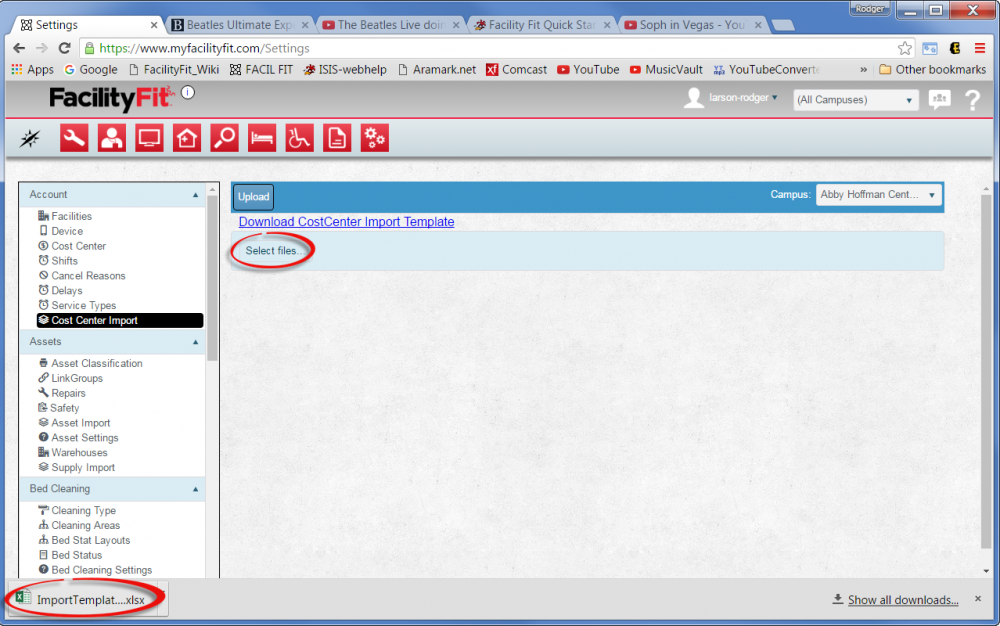
- Click the Download CostCenter Import Template link at the top of the window.
- The delay 'ImportTemplateCostCenter excel file will download.
- Open the file and make changes, then save the revised file under a new name.
- Use the Select Files button to find and upload the edited version. The file will be uploaded to the window.
- Skip to Step 4.
|
| 3
|
Add a New Cost Center Import
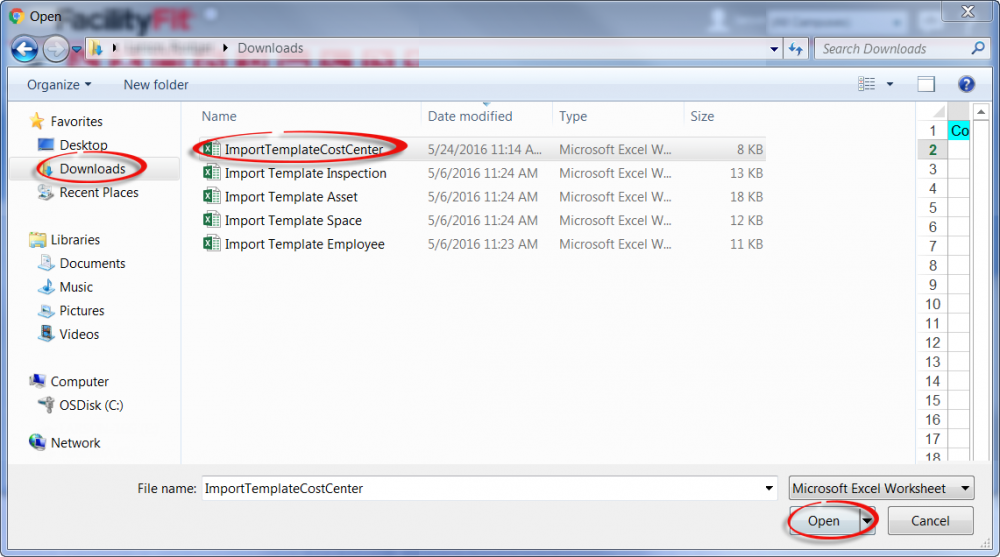
- Once the new template is prepared, press the Select Files button.
- Select the new template you have prepared
- Press the Open button.
|
| 4
|
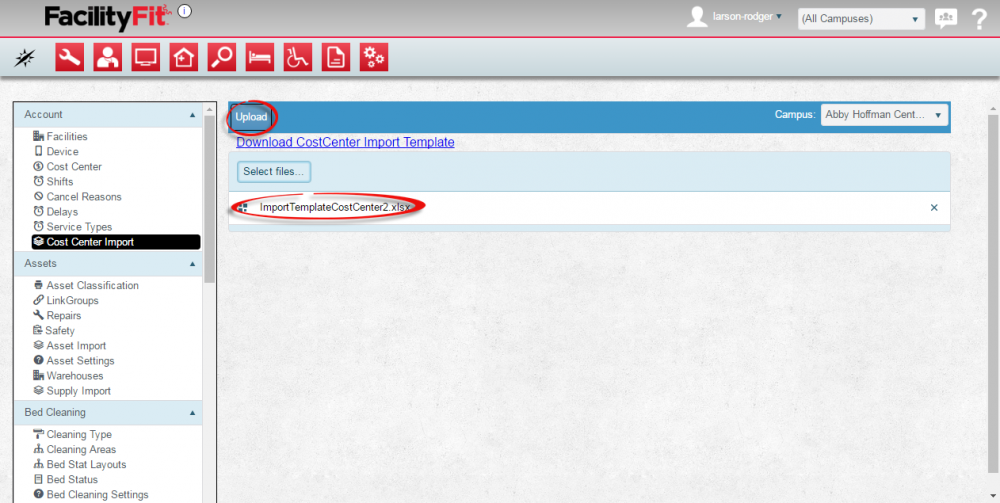
The file will be uploaded to the window.
Press the Upload button to place it into the system.
|
| 5
|
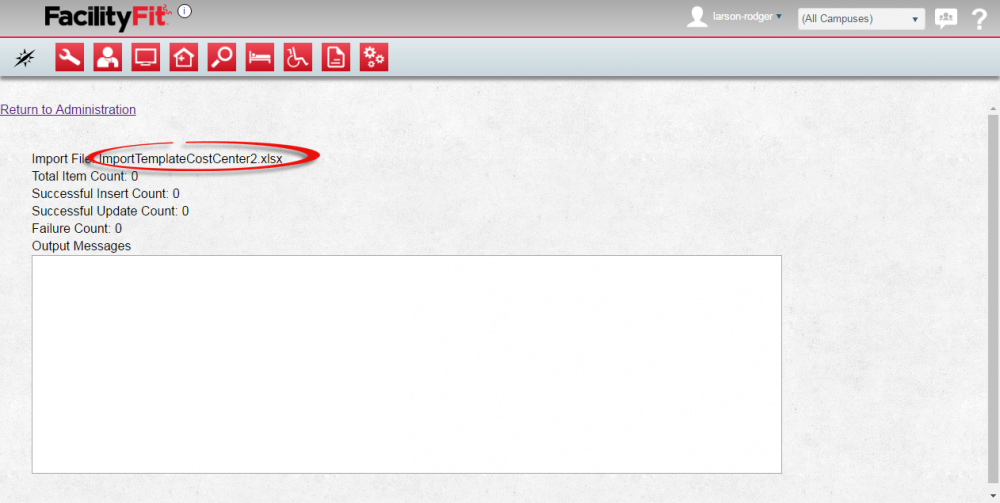
The Window will show the import file's name.
|


