Difference between revisions of "Add New Asset"
From MyFacilityFitPro_Wiki
(Created page with "== Add New Asset == {| class="wikitable" |- style="vertical-align:top;" |<big>'''<font size="5">1</font>'''</big> |Click '''Asset''' button to open the asset landing page. ...") |
(Tag: VisualEditor) |
||
| (One intermediate revision by the same user not shown) | |||
| Line 1: | Line 1: | ||
| + | Create a new asset | ||
| + | |||
== Add New Asset == | == Add New Asset == | ||
{| class="wikitable" | {| class="wikitable" | ||
| Line 5: | Line 7: | ||
|Click '''Asset''' button to open the asset landing page. | |Click '''Asset''' button to open the asset landing page. | ||
[[File:MenuAssets.png|80x80px]] | [[File:MenuAssets.png|80x80px]] | ||
| − | The Asset Landing page opens.[[File:AssetLanding.png|1000x1000px]] | + | |
| + | The Asset Landing page opens. | ||
| + | |||
| + | [[File:AssetLanding.png|1000x1000px]] | ||
|- style="vertical-align:top;" | |- style="vertical-align:top;" | ||
| Line 28: | Line 33: | ||
* '''Photos''' - Add Images (Optional) | * '''Photos''' - Add Images (Optional) | ||
Required fields are in Red. Click '''button''' to open the clone window | Required fields are in Red. Click '''button''' to open the clone window | ||
| + | |||
| + | '''Example:''' Add Housekeeping asset | ||
| + | |||
[[File:Asset-AddAsset.png|1000x1000px]] | [[File:Asset-AddAsset.png|1000x1000px]] | ||
| Line 46: | Line 54: | ||
|Click '''Asset''' button to open the asset landing page. | |Click '''Asset''' button to open the asset landing page. | ||
[[File:MenuAssets.png|80x80px]] | [[File:MenuAssets.png|80x80px]] | ||
| + | |||
The Asset Landing page opens. | The Asset Landing page opens. | ||
| + | |||
[[File:AssetLanding.png|1000x1000px]] | [[File:AssetLanding.png|1000x1000px]] | ||
|- style="vertical-align:top;" | |- style="vertical-align:top;" | ||
|<big>'''<font size="5">2</font>'''</big> | |<big>'''<font size="5">2</font>'''</big> | ||
| − | | | + | |If the Asset Number is known, type it into the Search field. The asset will be returned. |
|- style="vertical-align:top;" | |- style="vertical-align:top;" | ||
| − | |<big>'''<font size="5"> | + | |<big>'''<font size="5">3</font>'''</big> |
| − | | | + | |If the Asset Number is not known, the Filter can be used to limit the results to the service type and building the where the Asset can be found. |
| − | + | ||
| − | + | [[File:Asset-FilterFields.png]] | |
| − | + | |} | |
| − | + | ||
Latest revision as of 13:48, 18 April 2016
Create a new asset
Add New Asset
| 1 | Click Asset button to open the asset landing page.
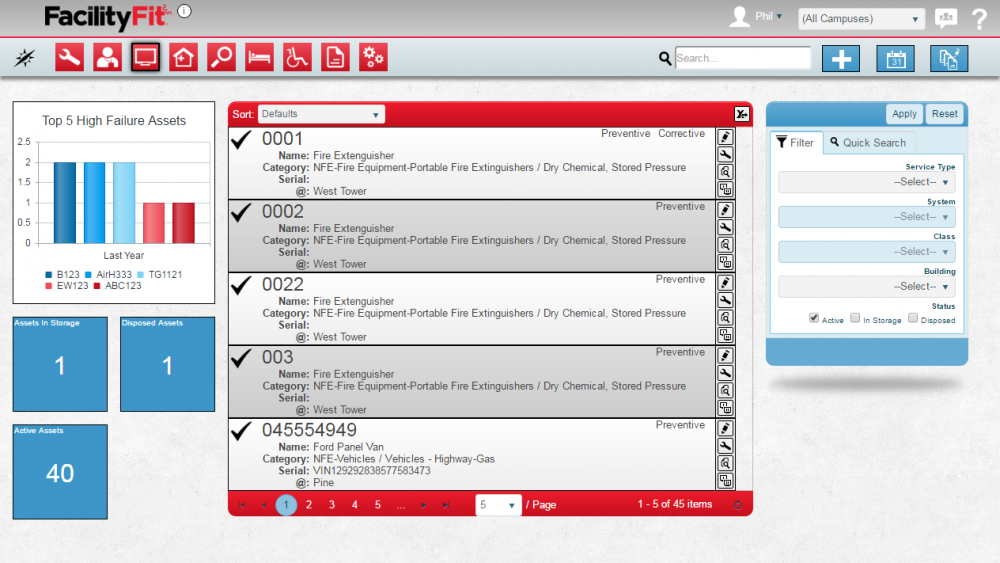
The Asset Landing page opens. |
| 2 | Click the Add button to open the add asset window. |
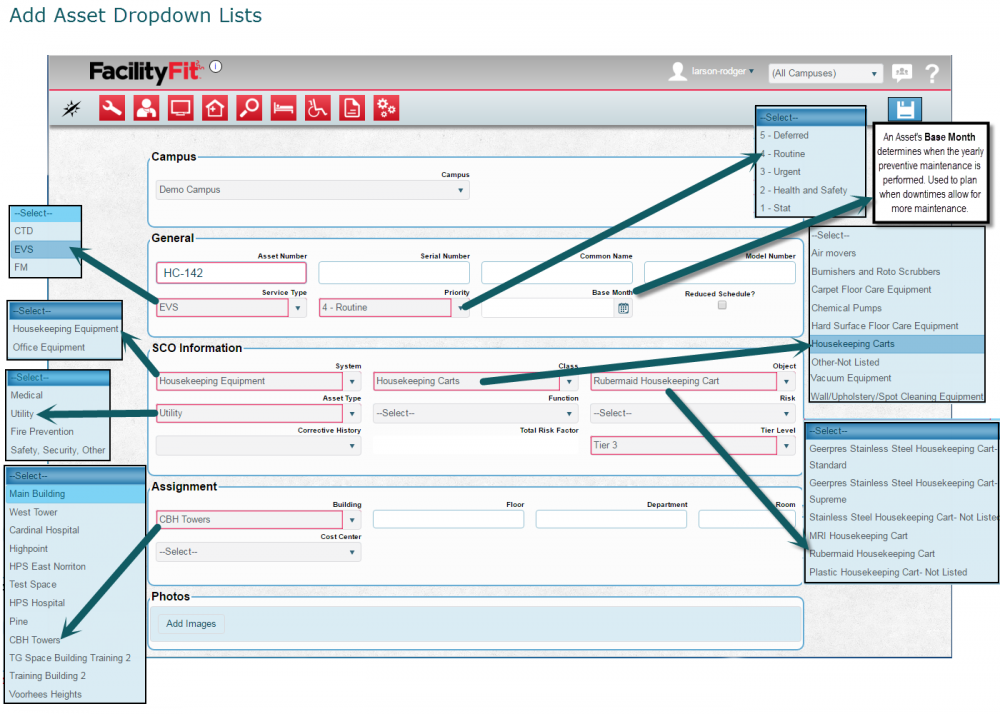
| 3 | Sections are shown for Campus, General, SCO information, Assignment and Photos.
Note: The dropdown selections are dependent on the selections already made so proceed by section from top to bottom, and left to right
Required fields are in Red. Click button to open the clone window Example: Add Housekeeping asset |
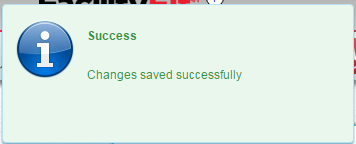
| 4 | Click Save button to save the new asset to the system.A Changes Saves pop-up will briefly appear. |
Confirm the new Asset
| 1 | Click Asset button to open the asset landing page.
The Asset Landing page opens. |
| 2 | If the Asset Number is known, type it into the Search field. The asset will be returned. |
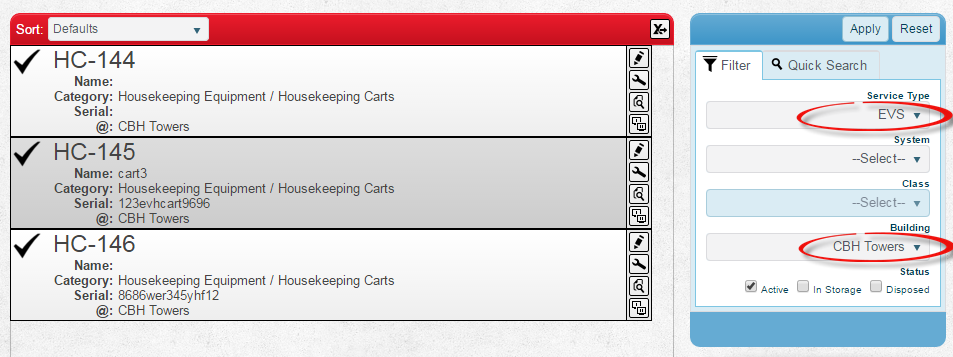
| 3 | If the Asset Number is not known, the Filter can be used to limit the results to the service type and building the where the Asset can be found. |


