Difference between revisions of "Import screens"
From MyFacilityFitPro_Wiki
(Created page with "== Function Import Screen == Add an Import to the Facility Fit system. See Cost Center Import sample below. {| class="wikitable" |- style="vertical-align:top;" |<big>'''<fon...") |
|||
| (2 intermediate revisions by the same user not shown) | |||
| Line 1: | Line 1: | ||
| − | == Function Import Screen == | + | == "Function" Import Screen == |
| − | + | Import existing data to the Facility Fit system. | |
| + | Download the template, add the data into the columns and rows to conform with the template layout. | ||
| + | Upload the data filled template back to the system to populate the system with your existing data. | ||
| + | |||
| + | See the "Function" import below using "Cost Center" Import as a sample. | ||
{| class="wikitable" | {| class="wikitable" | ||
| Line 8: | Line 12: | ||
|Click the large '''Admin''' icon to open the Administration window. [[Image:Administration.png]] | |Click the large '''Admin''' icon to open the Administration window. [[Image:Administration.png]] | ||
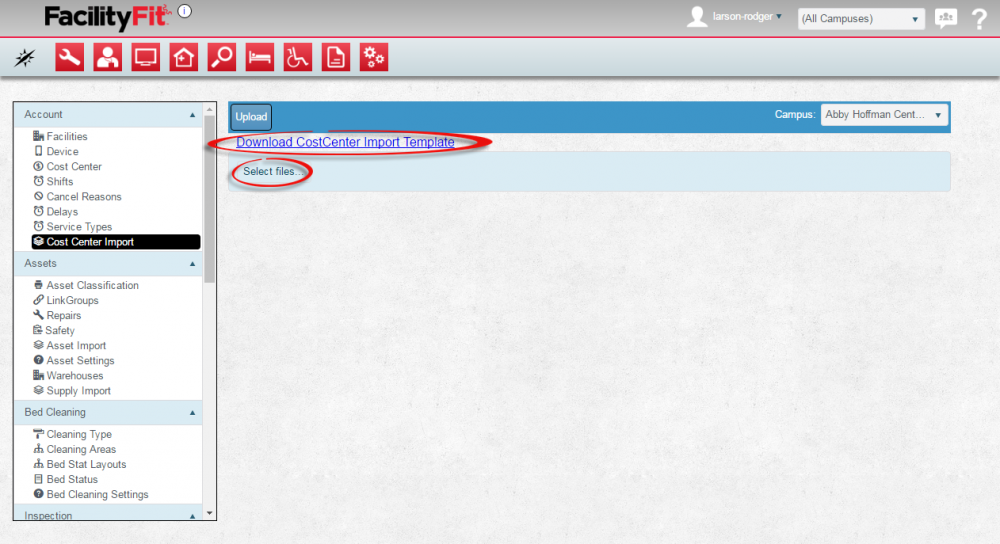
| − | Under the '''Account''' section, press the '''Function Import''' link. The | + | Under the '''Account''' section, press the '''"Function" Import''' link, in our sample it will be the '''"Cost Center" Import''' link. The window will open. |
| − | # To edit a | + | # To edit a function import template, click the '''Download''' '''Function Import Template''' link at the top of the window. |
| − | # To upload a new Function Import template, press the '''Select Files''' button. | + | # To upload a new Function Import template, press the '''Select Files''' button. Then select the new file, then '''Upload''' the new file. |
[[File:Admin-Account-CostCenterImportHome1.png|1000x1000px]] | [[File:Admin-Account-CostCenterImportHome1.png|1000x1000px]] | ||
| Line 17: | Line 21: | ||
|<big>'''<font size="5">2</font>'''</big> | |<big>'''<font size="5">2</font>'''</big> | ||
|'''Edit a Cost Center Import''' | |'''Edit a Cost Center Import''' | ||
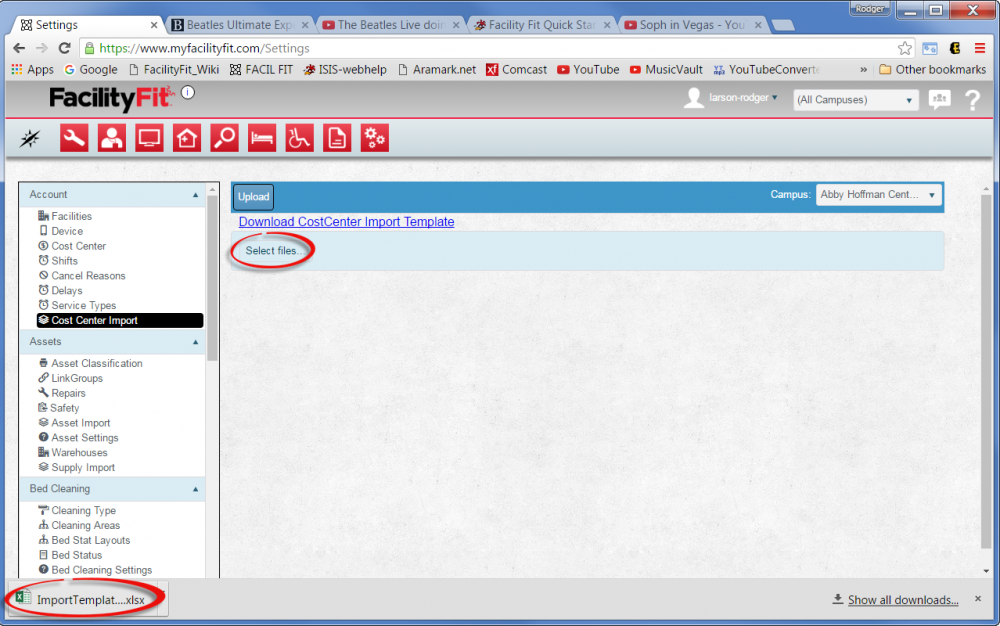
| − | # Click the '''Function Import Template''' link at the top of the window. | + | # Click the '''Download "Function" Import Template''' link at the top of the window. |
# The Function excel file will download. | # The Function excel file will download. | ||
| − | |||
| − | |||
| − | |||
[[File:Admin-Account-CostCenterImportDownloadTemplate2.png|1000x1000px]] | [[File:Admin-Account-CostCenterImportDownloadTemplate2.png|1000x1000px]] | ||
| − | |||
|- style="vertical-align:top;" | |- style="vertical-align:top;" | ||
|<big>'''<font size="5">3</font>'''</big> | |<big>'''<font size="5">3</font>'''</big> | ||
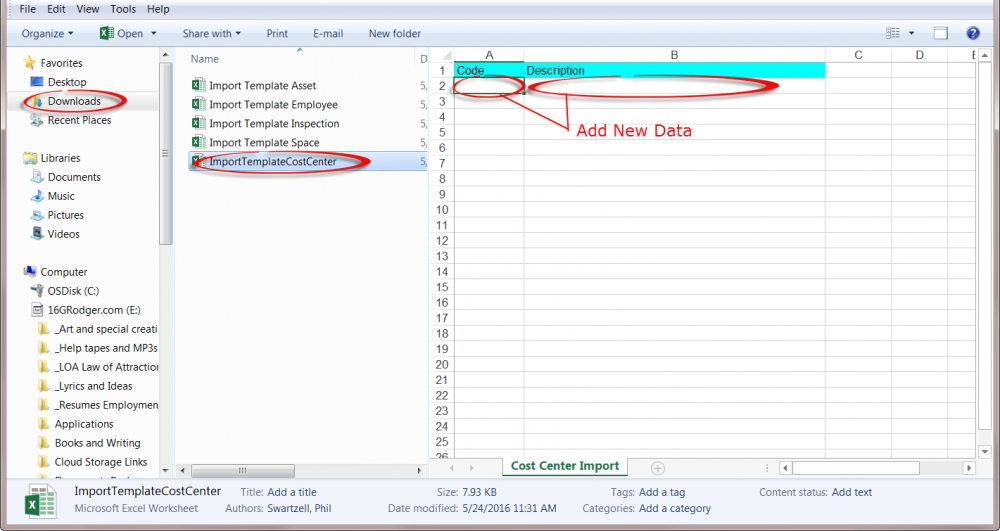
| − | | | + | |Go to your download folder and open the downloaded file and make changes (add data), then save the revised file under a new name. |
| − | + | ||
| − | + | ||
| − | + | ||
| − | + | ||
| − | + | ||
| + | [[File:Admin-Account-CostCenterFillOutTemplate3b.png|1000px]] | ||
|- style="vertical-align:top;" | |- style="vertical-align:top;" | ||
|<big>'''<font size="5">4</font>'''</big> | |<big>'''<font size="5">4</font>'''</big> | ||
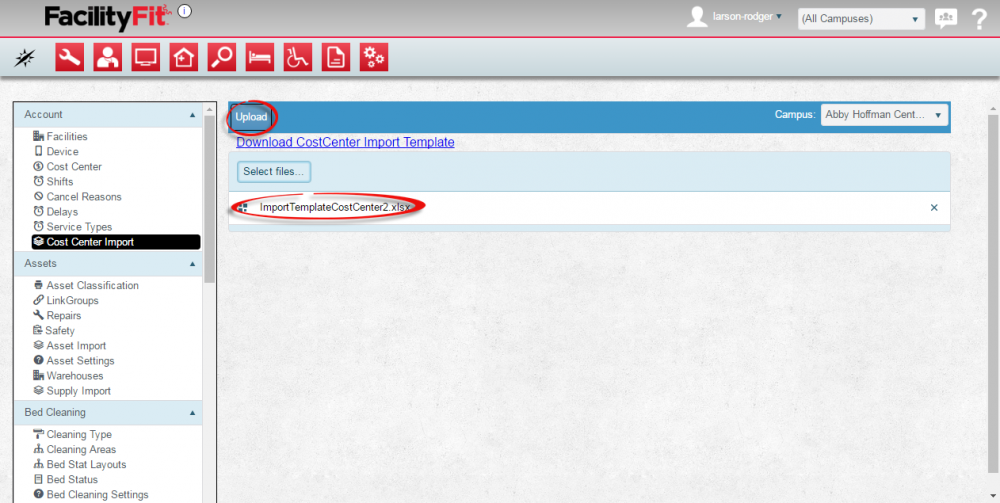
| + | |Use the '''Select Files''' button to select and upload the edited version. The file will be uploaded to the window. | ||
| + | [[File:Admin-Account-CostCenterImportDownloadTemplate2.png|1000x1000px]] | ||
| + | |||
| + | |||
| + | |- style="vertical-align:top;" | ||
| + | |<big>'''<font size="5">5</font>'''</big> | ||
|The file will be uploaded to the window. | |The file will be uploaded to the window. | ||
Press the '''Upload''' button to place it into the system. | Press the '''Upload''' button to place it into the system. | ||
| Line 44: | Line 46: | ||
|- style="vertical-align:top;" | |- style="vertical-align:top;" | ||
| − | |<big>'''<font size="5"> | + | |<big>'''<font size="5">6</font>'''</big> |
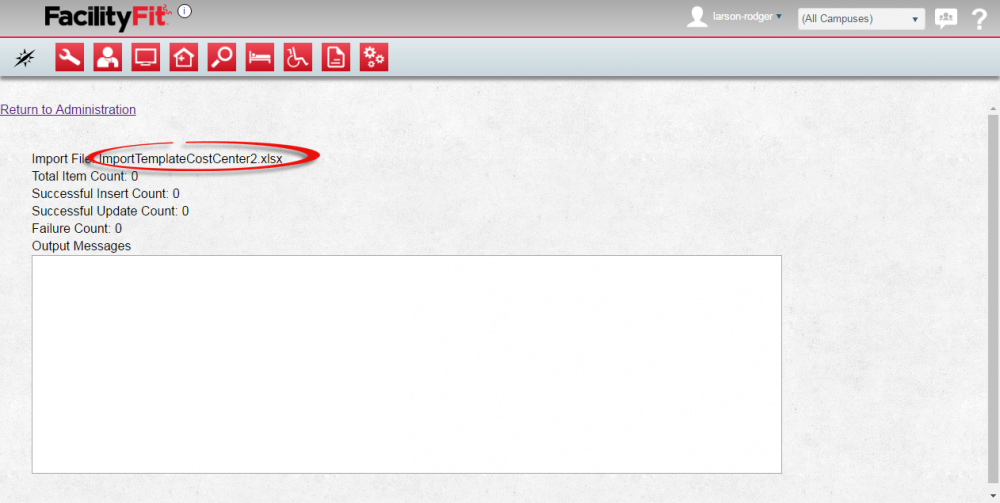
|The Window will show the import file's name. | |The Window will show the import file's name. | ||
Latest revision as of 13:54, 25 May 2016
"Function" Import Screen
Import existing data to the Facility Fit system. Download the template, add the data into the columns and rows to conform with the template layout. Upload the data filled template back to the system to populate the system with your existing data.
See the "Function" import below using "Cost Center" Import as a sample.
