Difference between revisions of "Step-by-Step Work Requests"
From MyFacilityFitPro_Wiki
(→Add New Work Request) |
(→Add New Work Request) |
||
| Line 4: | Line 4: | ||
|- style="vertical-align:top;" | |- style="vertical-align:top;" | ||
| 1 | | 1 | ||
| − | | Click '''Add''' to Create a new Work Request. | + | | Click '''Add''' to Create a new Work Request. Fields outlined in the color Red are required fields. All other fields are optional. |
[[Image:AddWorkOrder.png|300px]] | [[Image:AddWorkOrder.png|300px]] | ||
| Line 34: | Line 34: | ||
|- style="vertical-align:top;" | |- style="vertical-align:top;" | ||
| 7 | | 7 | ||
| − | |'''Asset''' - Select an Asset that | + | |'''Asset''' - Select an Asset that is part of the Work Request. If you added an asset that you don't need remove it with the '''Delete Asset''' button. |
[[Image:Asset.png|700px]] | [[Image:Asset.png|700px]] | ||
|- style="vertical-align:top;" | |- style="vertical-align:top;" | ||
| 8 | | 8 | ||
| − | |'''Add Asset''' - | + | |'''Add Asset''' - Search for an Asset or select from the list by clicking the '''Select''' button. Only one Asses can be added. |
[[Image:AddAssetSelected.png|700px]] | [[Image:AddAssetSelected.png|700px]] | ||
Revision as of 11:43, 15 March 2016
Add New Work Request
| 1 | Click Add to Create a new Work Request. Fields outlined in the color Red are required fields. All other fields are optional. |
| 2 | Campus - Select a Campus from the drop-down list. |
| 3 | General Information - Make selections from the drop-down lists. The Reference field can be used for notes or to reference customer work order numbers or ID's, etc. |
| 4 | Contact Information - Enter the contact information of the person who needs to be informed of this request. Check the box Customer Notification? if you want the customer to receive an email containing the Work Request details. |
| 5 | Assignment - Type search words in the Search space... field to select locations or select the locations from the Building, Floor and Room drop-down lists. Enter the name of the person who can approve the assignment. |
| 6 | Description - Check the box if Aramark found the issue. Uncheck the box if the customer reported the issue. Type a description of the issue in the Description field. |
| 7 | Asset - Select an Asset that is part of the Work Request. If you added an asset that you don't need remove it with the Delete Asset button. |
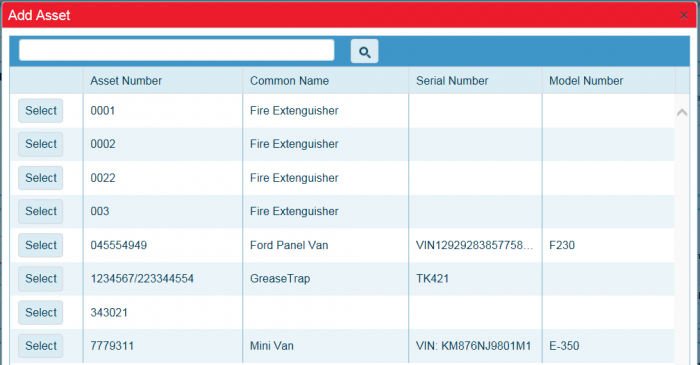
| 8 | Add Asset - Search for an Asset or select from the list by clicking the Select button. Only one Asses can be added. |
| 9 | Photos - Attach photos of the issue that needs to be worked on. Add before and after photos. |
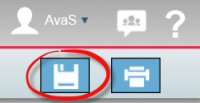
| 10 | Save - Click the Save icon to save the request and enter it into the system. |
| 11 | View the new Work Request record from the dashboard. Give the new Work Request number to the requester or record it for future reference. |


