From MyFacilityFitPro_Wiki
Revision as of 10:43, 26 May 2016
Cleaning Area
Editing and Adding Cleaning Area =
| 1
|
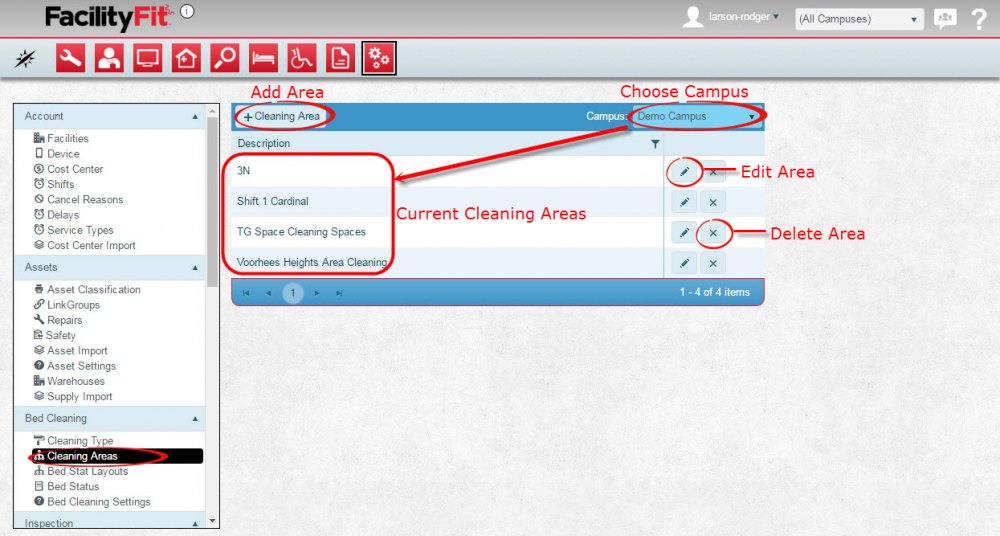
Click the Large Admin icon to open the Administration window.
Under the Account section, press the Cleaning Area link. The Cleaning Area window will open.
|
| 2
|
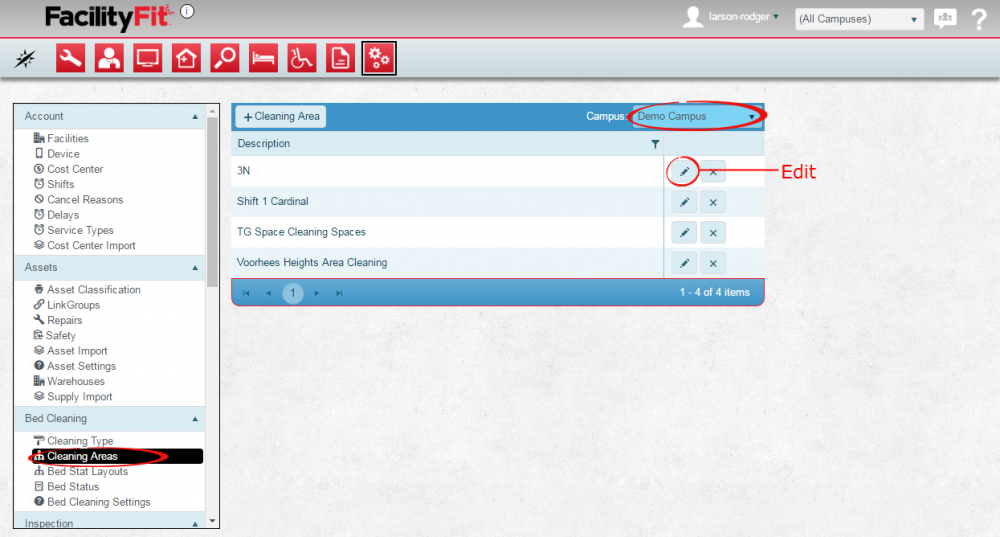
To edit a Cleaning Area, click the Edit button at the end of the row of the Cleaning Area to be edited.
The window for that Cleaning Area will open.
|
| 3
|
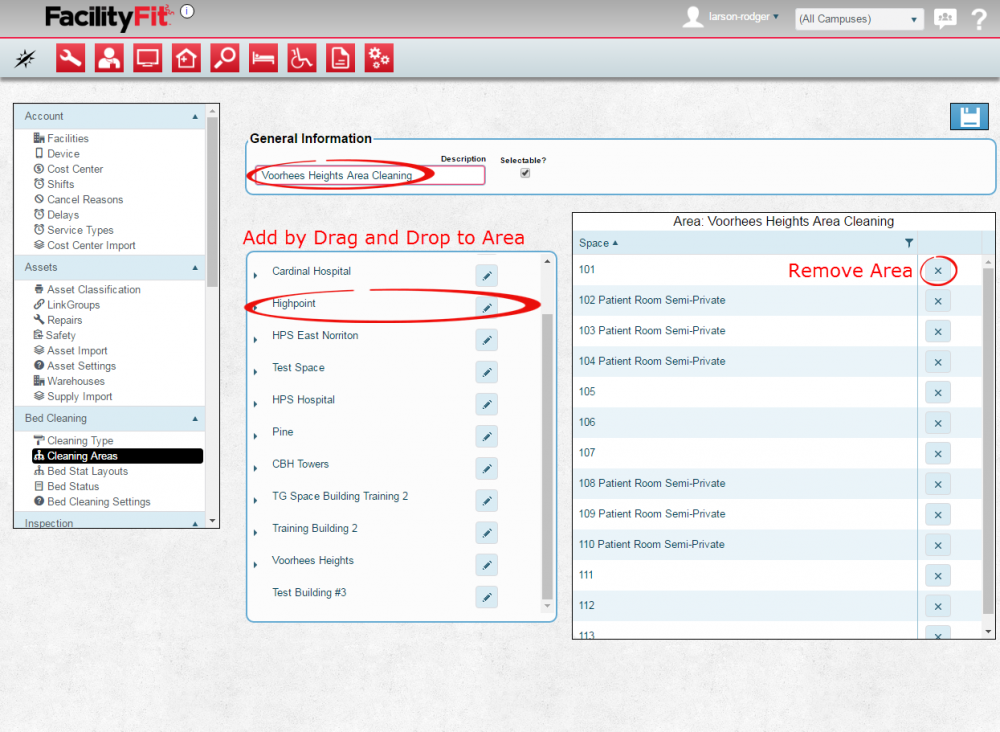
Make edits as necessary, including Removing Areas using the Delete button, or Dragging a Level space to the cleaning area window.
|
| 4
|
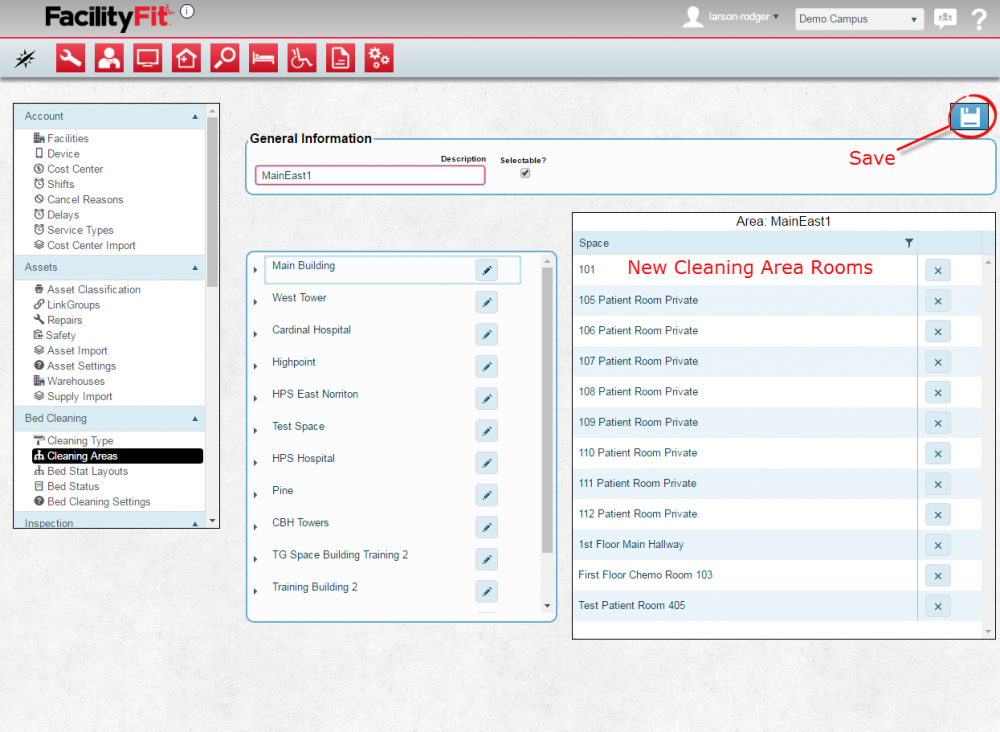
Press Save when done. [[Image:Save.png]
|
| 5
|
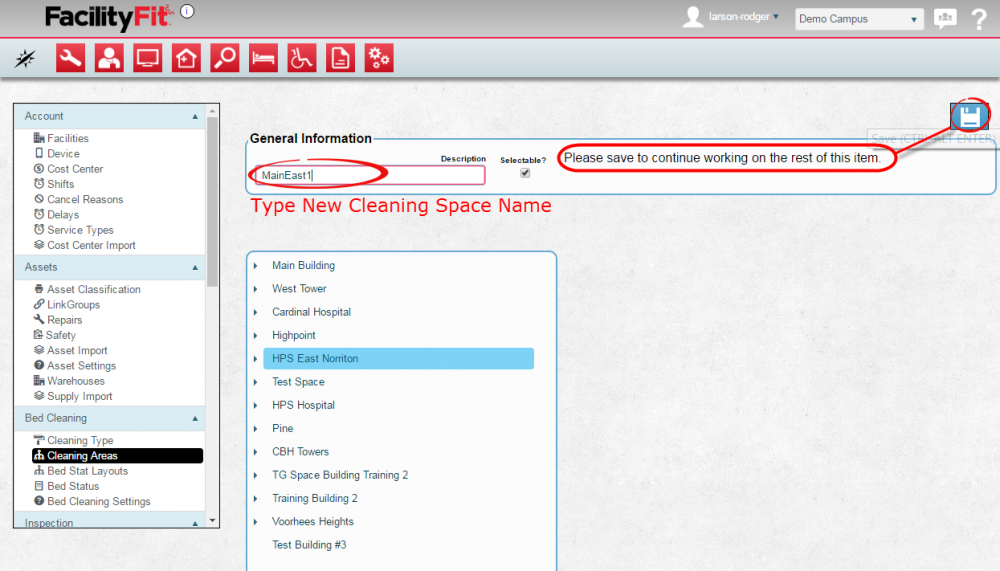
To add a new cleaning Area Select the + Cleaning Area button.
The cleaning area window will appear. Choose a campus.
Type the name of the new cleaning area into the Description field.
Press Save to continue. 
|
| 6
|
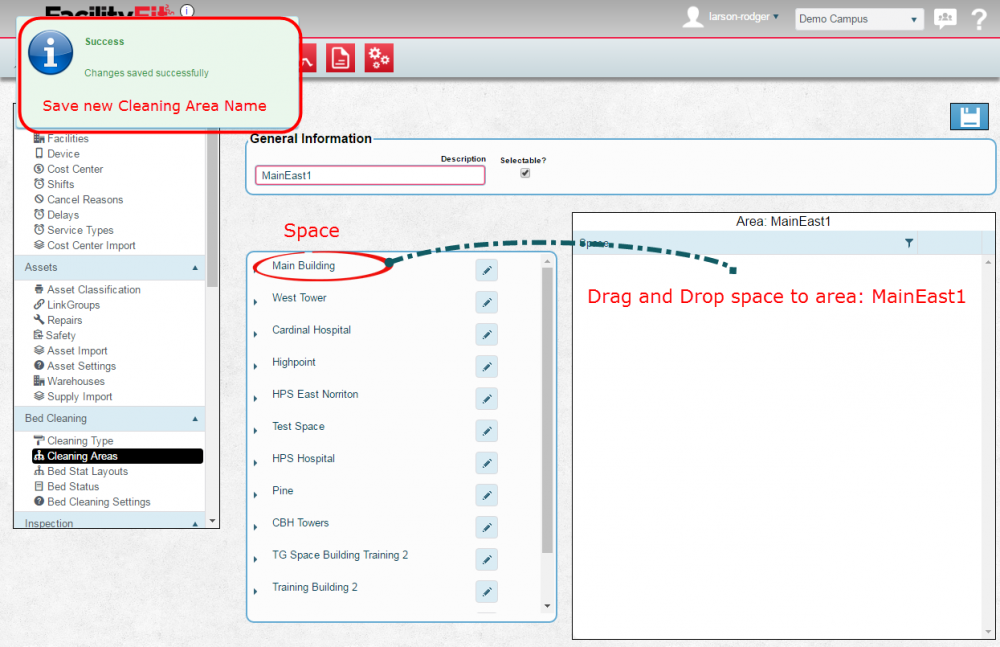
Drag and Drop Spaces into the cleaning space area. Press Save to continue. 
|
| 7
|
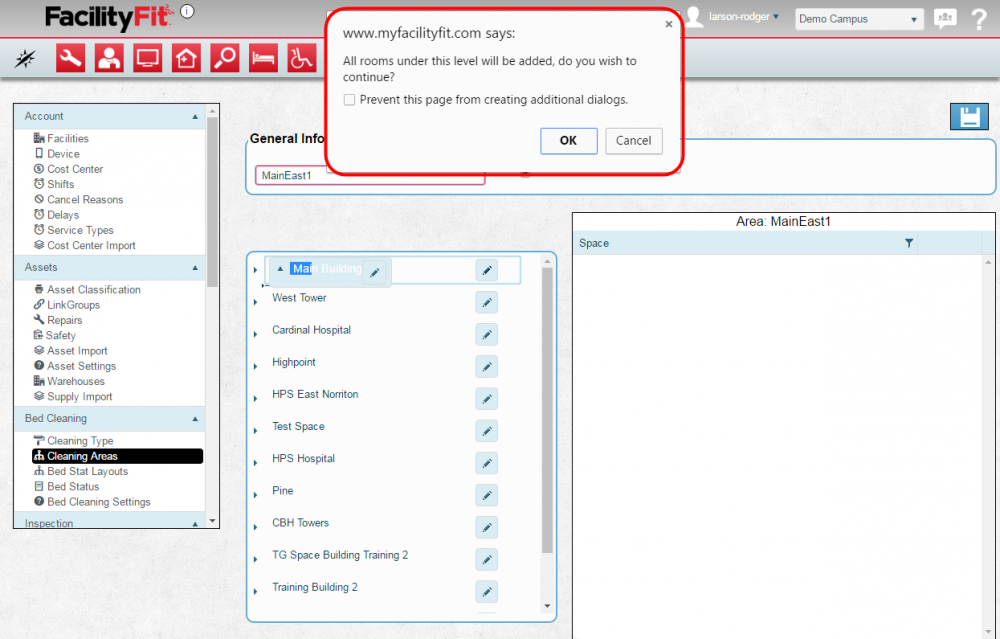
A pop-up will read: "All Rooms under this level will be added, do you wish to continue?".
Press OK to continue.
|
| 8
|
The rooms from that level appear in the cleaning area. Use the delete button to remove them, if necessary.
|
Press Save when done. 

|


