Difference between revisions of "Meetings"
(→Filtering) |
|||
| Line 26: | Line 26: | ||
|- | |- | ||
| − | | Adding a Meeting | + | | [[Adding a Meeting]] |
| [[Image:Add.png]] | | [[Image:Add.png]] | ||
| From the top right of the screen click the Add icon. Alternately double-click on a day in the calendar. | | From the top right of the screen click the Add icon. Alternately double-click on a day in the calendar. | ||
| Line 56: | Line 56: | ||
[[Image:TrainingFilter.png]] | [[Image:TrainingFilter.png]] | ||
| − | |||
| − | |||
| − | |||
| − | |||
| − | |||
| − | |||
| − | |||
| − | |||
| − | |||
| − | |||
| − | |||
| − | |||
| − | |||
| − | |||
| − | |||
| − | |||
| − | |||
| − | |||
| − | |||
| − | |||
| − | |||
| − | |||
| − | |||
| − | |||
| − | |||
| − | |||
| − | |||
| − | |||
| − | |||
| − | |||
| − | |||
| − | |||
| − | |||
| − | |||
| − | |||
| − | |||
| − | |||
| − | |||
| − | |||
Revision as of 11:44, 17 March 2016
Contents
Description
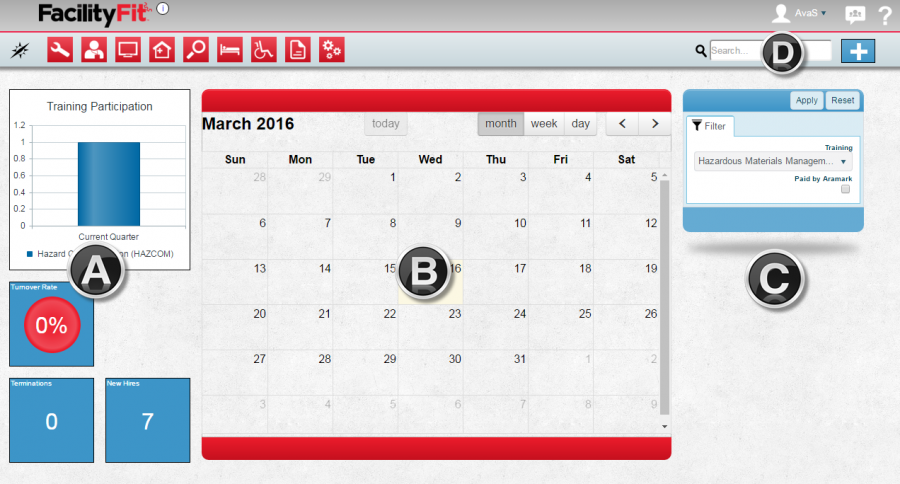
This functional area allows the user to schedule and track meetings, employee training and events happening throughout the facility using a monthly calendar.
Meetings Landing Page
A. - Metrics
- Training Participation -
- Turnover Rate -
- Terminations -
- New Hires -
B. - Calendar
C. - Filter
D. - Actions
Step-by-Step Help
Actions
| Adding a Meeting | |
From the top right of the screen click the Add icon. Alternately double-click on a day in the calendar. |
| Search for a Meeting | |
Type key words in the Search box and hit enter on the keyboard. |
Calendar
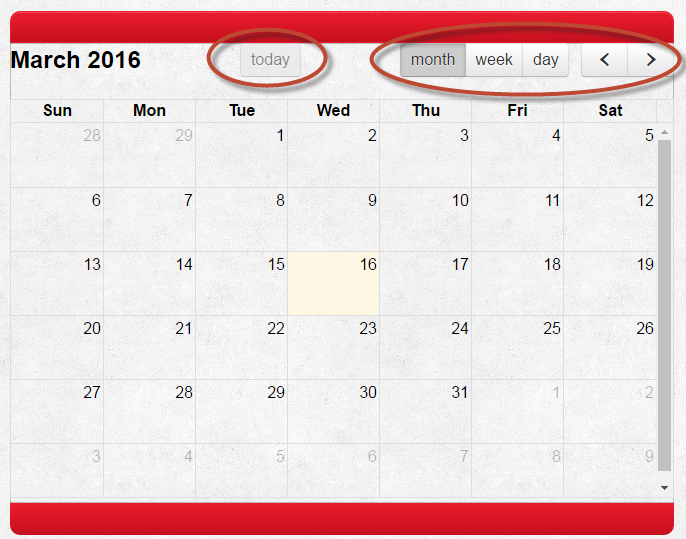
The calendar displays its default view by current month with today highlighted.
Click on the month, week, or day to change the view.
Use the arrow buttons to move forward and backward in the selected view.
Click on the today button to return to today's date.
Filtering
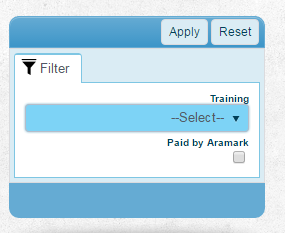
Use the Filter to select a Training course from the list.
The filter is based on the month, week, or 'day you have selected as your display.
Check the box if it is a course that is Paid by Aramark.
Click the Apply button.
Training courses appear in the date boxes on the calendar.
Click the Reset button to clear the filter.


