From MyFacilityFitPro_Wiki
Asset Classification
Add Asset Classifications to the transport request system.
| 1
|
Click the large Admin icon to open the Administration window. 
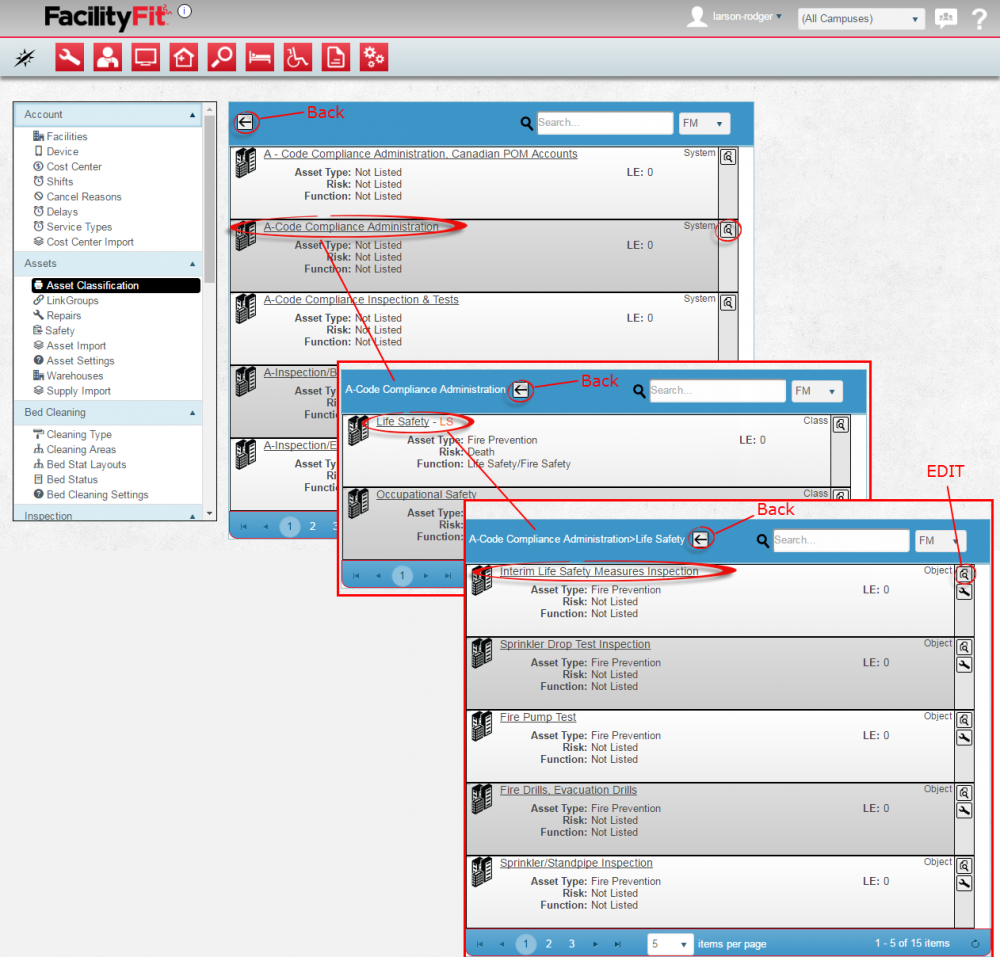
Under the Assets section, press the Asset Classification link. The Asset Classification window will open. Drill down to the asset from System to Class to Object level wanted by clicking on the link on the upper left of each row. Use the back button to go back.  . .
To edit an Asset Classification, click the View Text button at the end of the row. The Window for that asset will open.
|
| 2
|
Edit Asset Classification
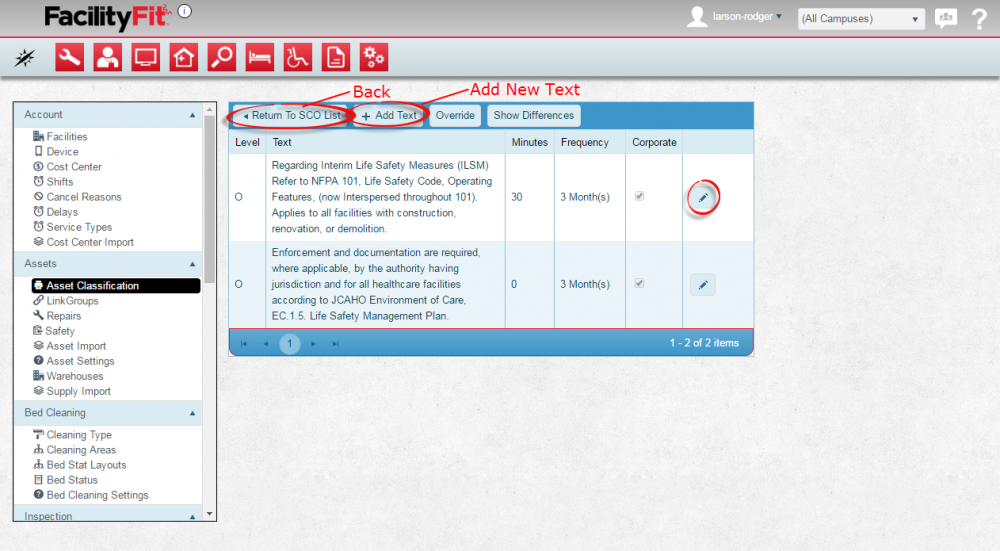
- Click the View Text button at the end of the Asset Classification's row to edit the text. The window for that asset will open.
- A table will appear with Level, Text, Minutes, Frequency and Corporate columns.
- Select the Edit icon on a row to make changes.
- Make changes as necessary and press the Save icon to complete the change.
- Press the Add Text button to add new information to the asset.
- When finished press the Return to SCO List button.
Note: Also note the Override button and the Show Differences button (see step 5).
|
| 3
|
Add New Text
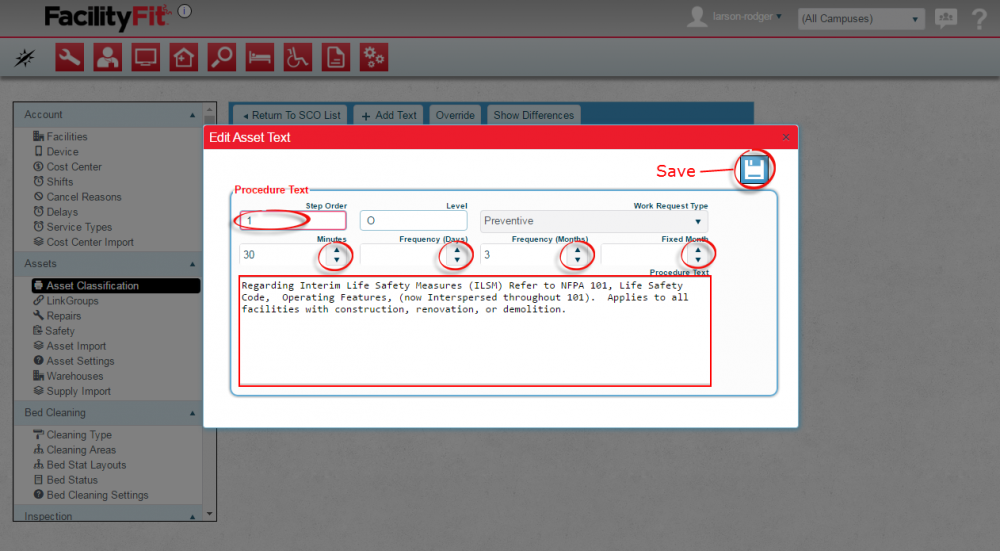
Press the Add New Text button and fill in the new fields with the new Add New Text description. Press the Save button when done to complete the addition.
|
| 4
|
Delete Text
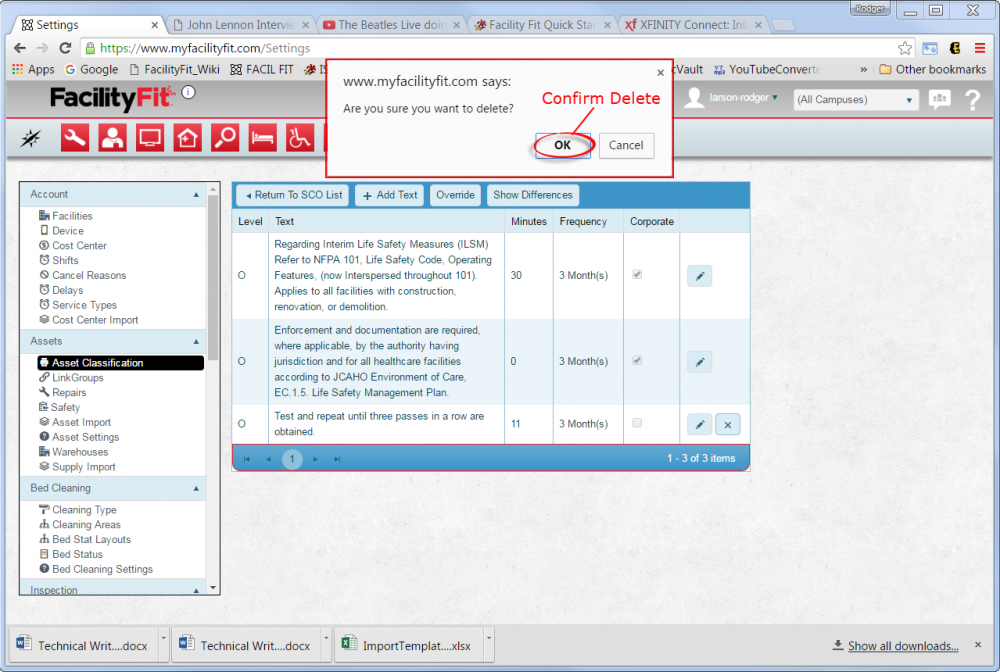
Press the Delete icon to delete text row.
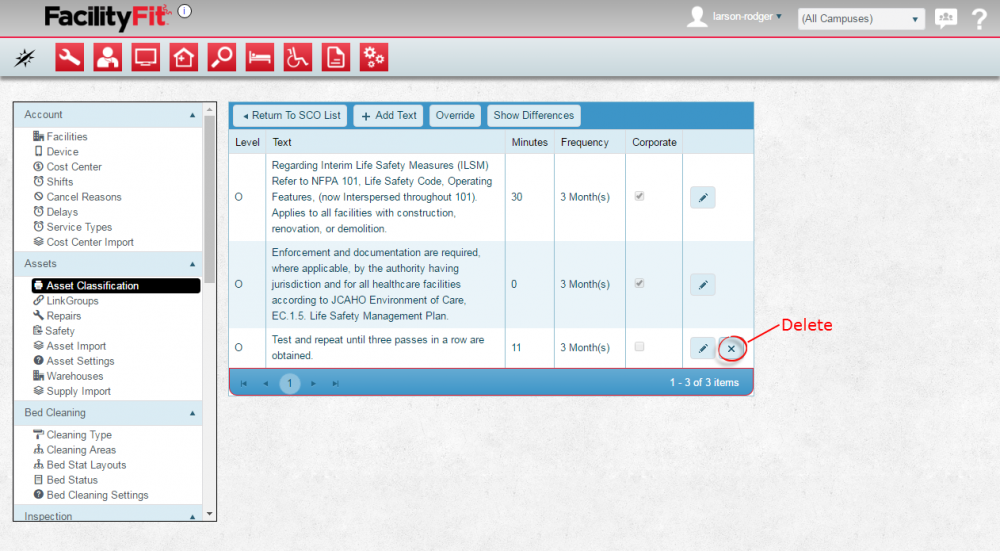 When the confirmation window askes if you are sure, press the Ok button.
|
| 5
|
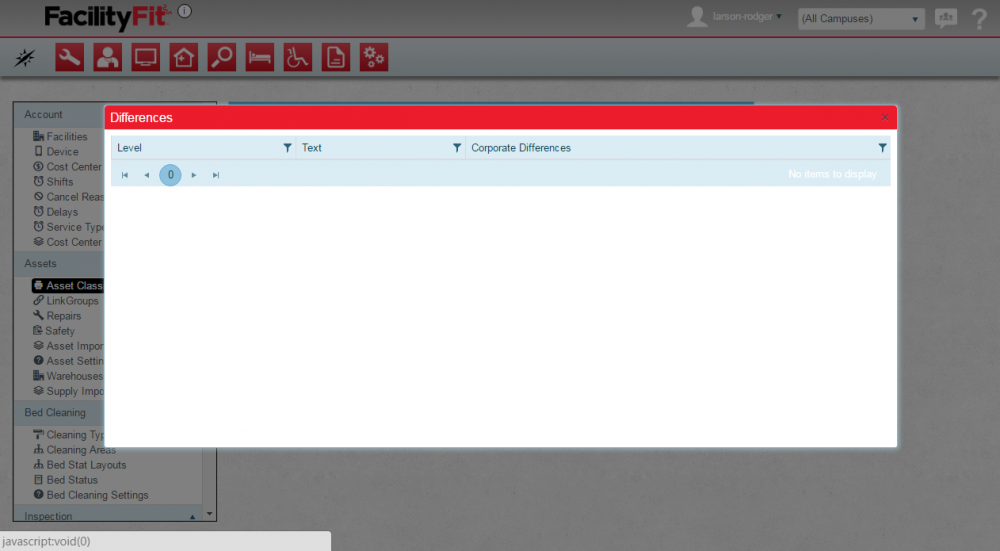
Press the Show Differences button to open the differences window. If there are any differences, they will appear here.
|