Transport Request Tool
Requests may be entered into the system by employees with access, or employees may call in the request.
Log into FacilityFit if you are not already logged in.
A Transport is Requested over the Phone
| 1
|
Click on the Transport Functional Area.

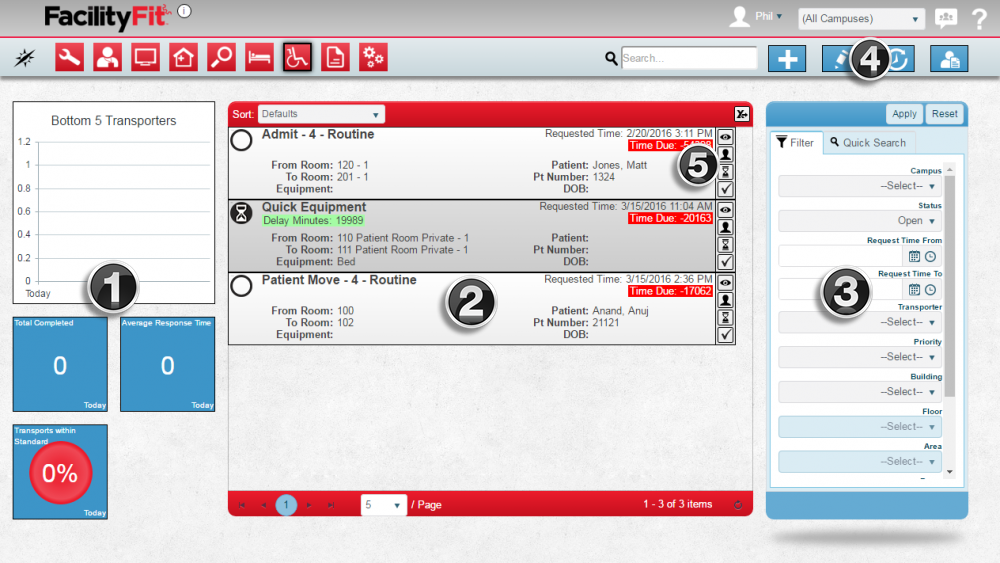
- Metrics
- List Display
- Filtering
- Actions
- Quick Actions
|
| 2
|
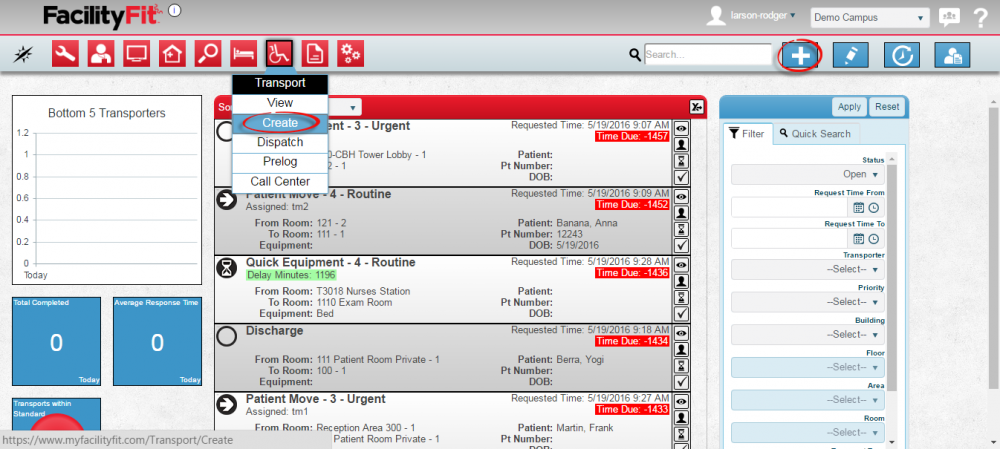
In the Actions area (4) Click on the Add button.  or select Create from the transport dropdown list. or select Create from the transport dropdown list.
|
| 3
|
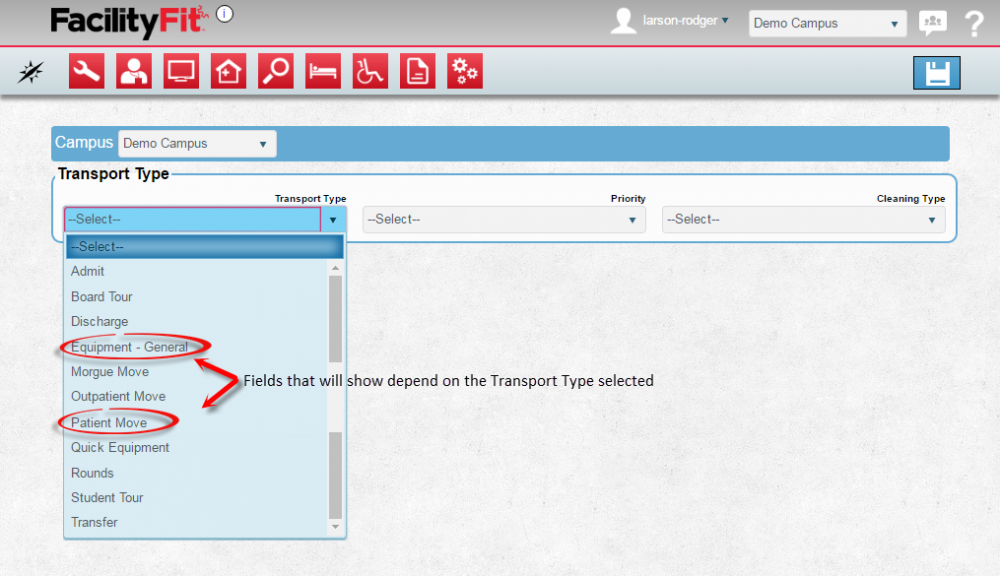
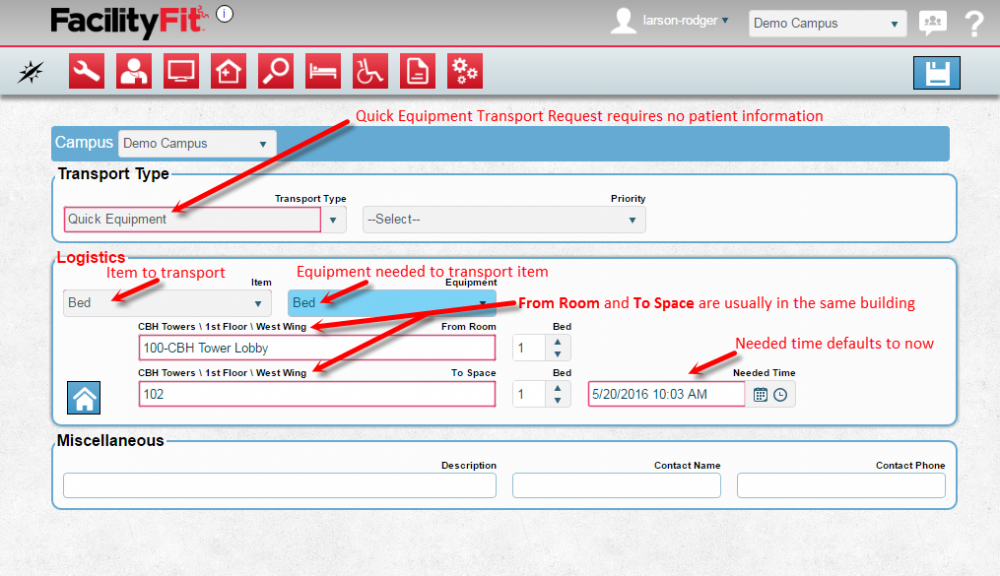
The Add Transport window will open. Select a Transport Type from the dropdown. The fields that will appear depend on the transport type selected.
|
| 4
|
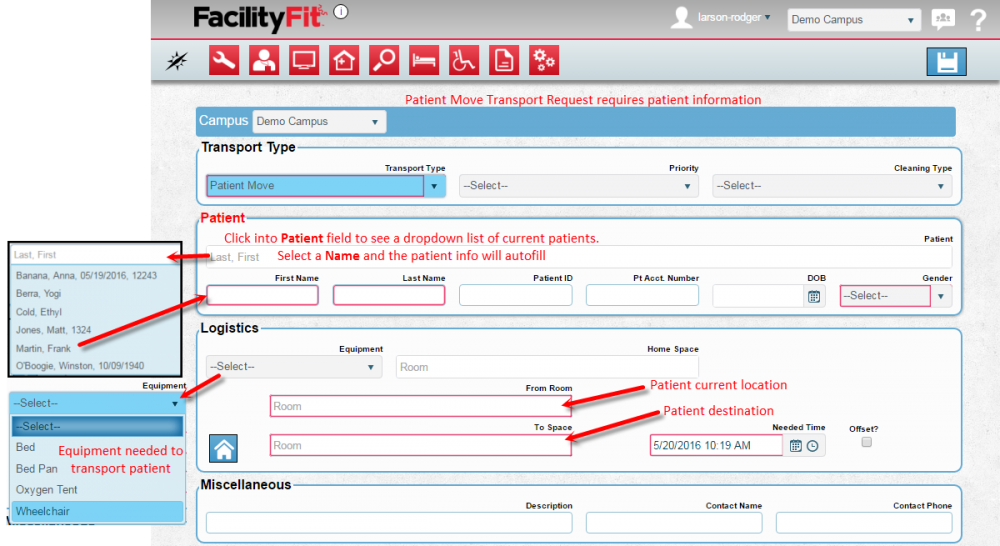
Gather information from the caller and enter it into the transport.
Patient Related transfers have patient information fields that are required.
|
| 5
|
For Equipment moves, no patient information is required.
|
| 6
|
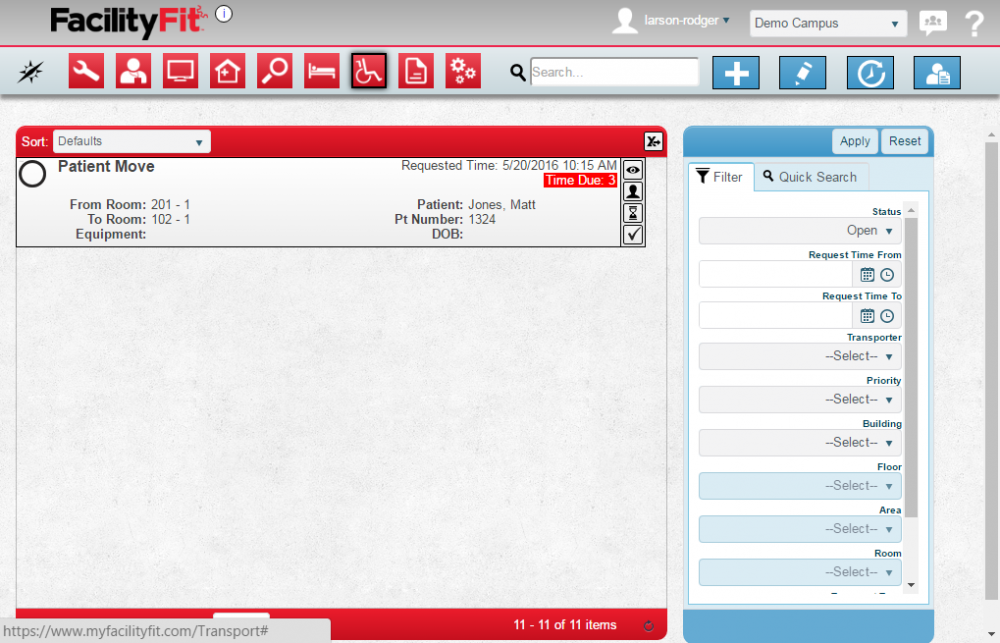
Click Save.

The finished Transport Request will be found in the Transport Request window.
|
| 7
|
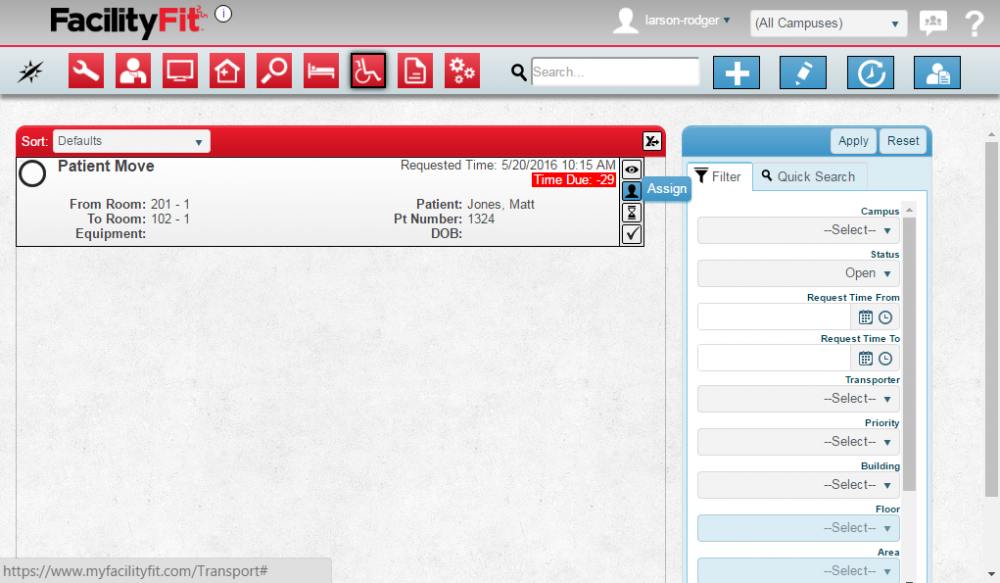
Assign the transport to a transporter. Select the request and click the Assign icon at the right of the row. 
|
| 8
|
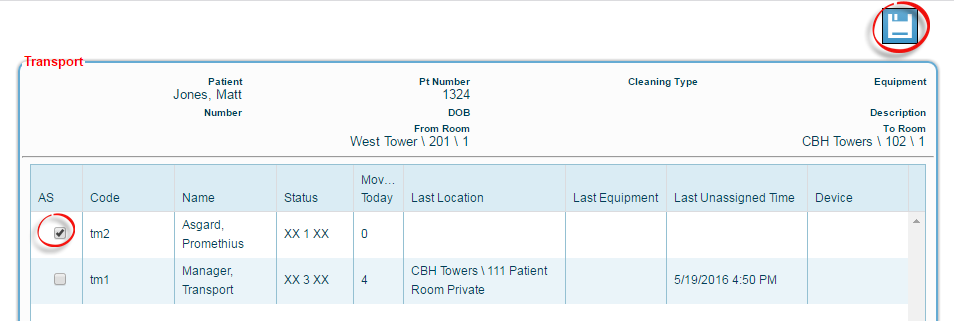
Click on one of the avaialble transporters and press the Save button. 
|
| 9
|
Once assigned, the Transport Request will show Assigned and the transporter ID.

|
The System Receives a Request from the Hospital Information System for a Transport
| 1
|
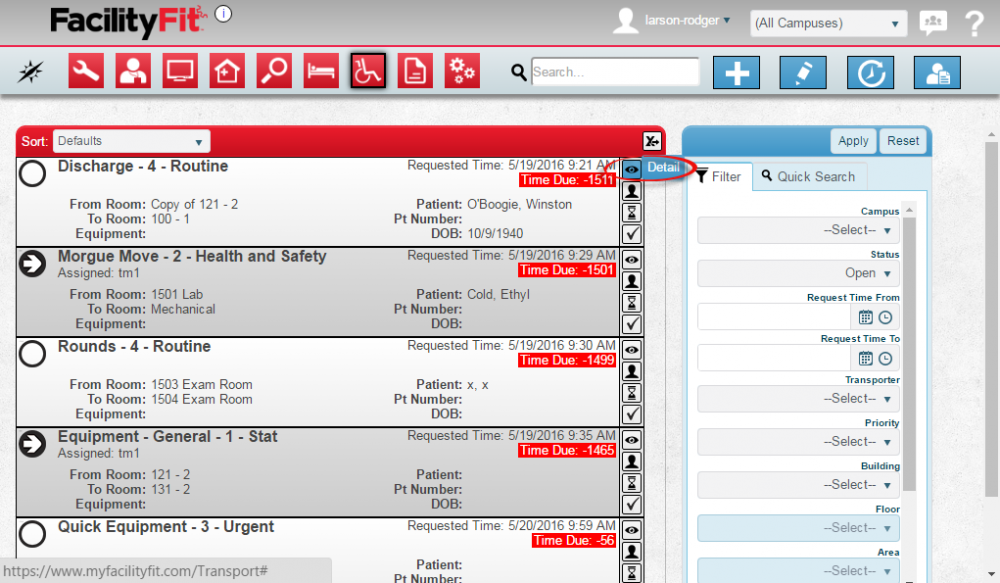
The Transport Request will show up on the Transport screen. Verify the transport information contains all necessary data, by pressing the Detail icon from the right of the row.
|
| 2
|
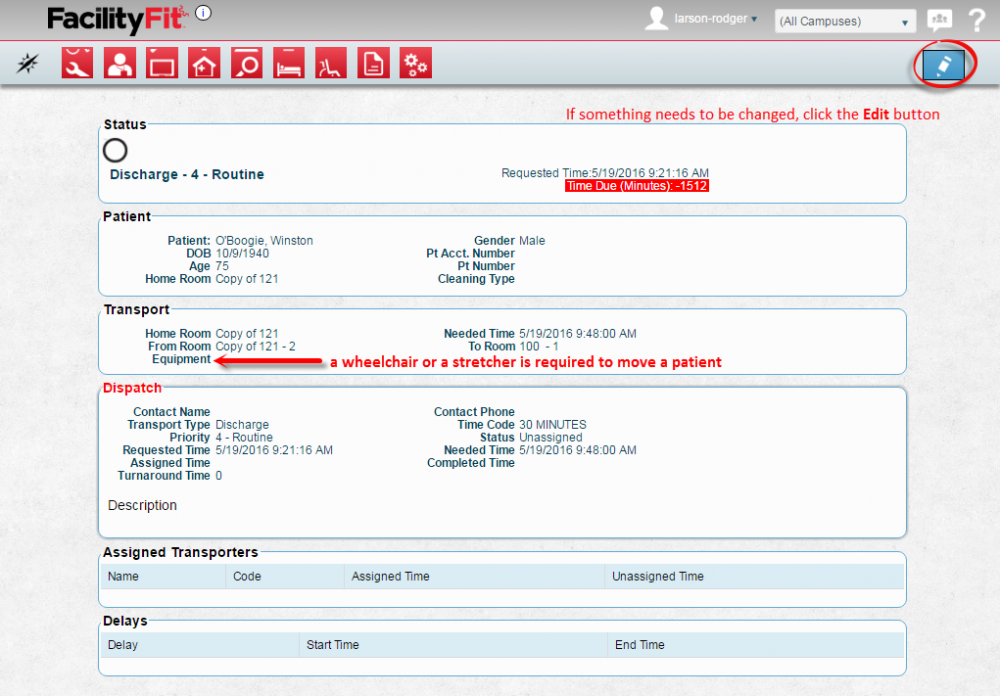
Review the details and make changes if necessary. Press Edit button to make changes. 
|
| 3
|
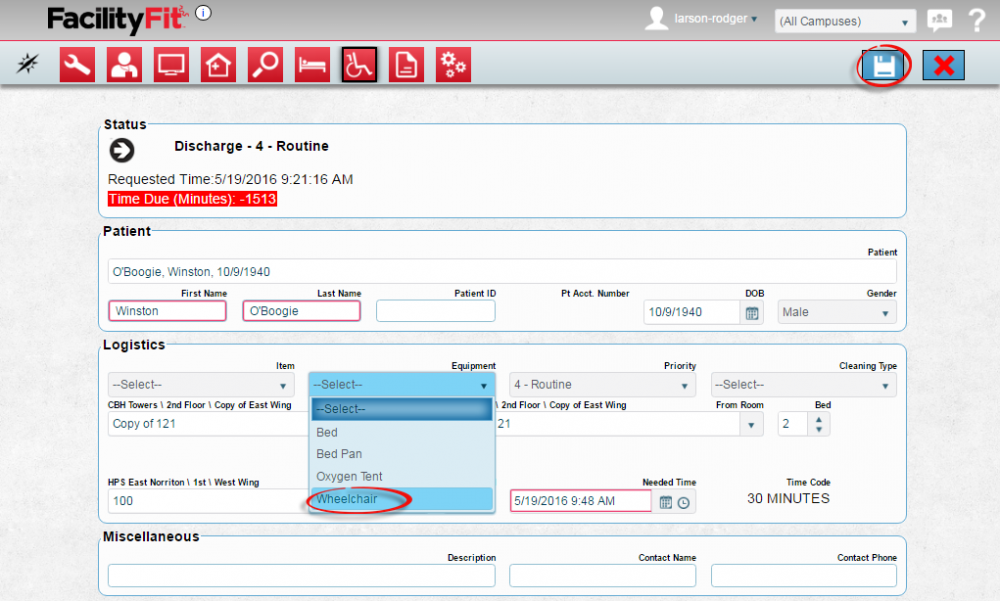
Make changes as needed and press Save when done. 
The revised Transport Request will be found in the Transport Request window.
|
| 4
|
To assign the transport request to a transporter, select the request and click the Assign icon at the right of the row.

A list of available transporters will appear.
|
| 5
|
Click on one of the available transporters and press the Save button. 

|
| 6
|
Once assigned, the Transport Request will show the words Assigned and show the transporter ID.

|


